Memory Box
The Thinking Part⌗
For this assignment, I decided to make 5 Memory Boxes.
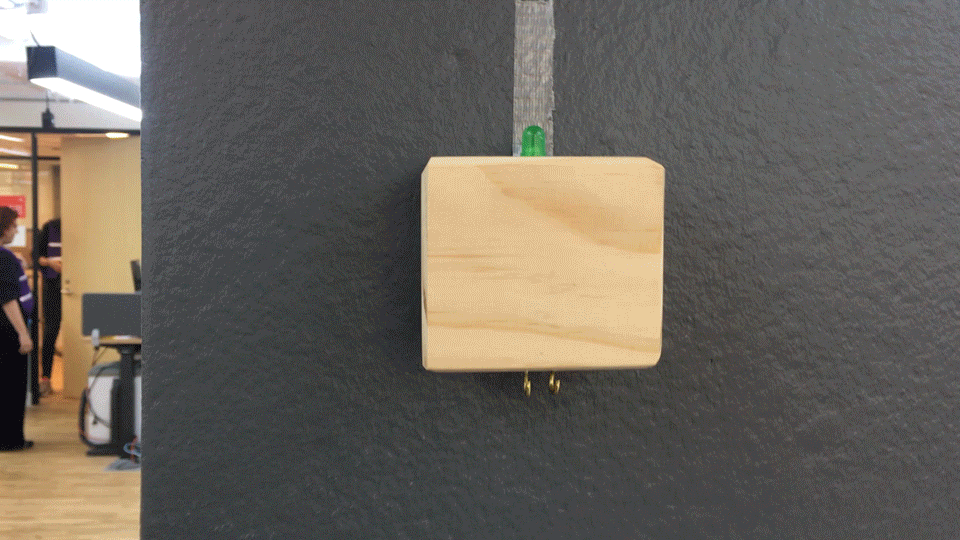
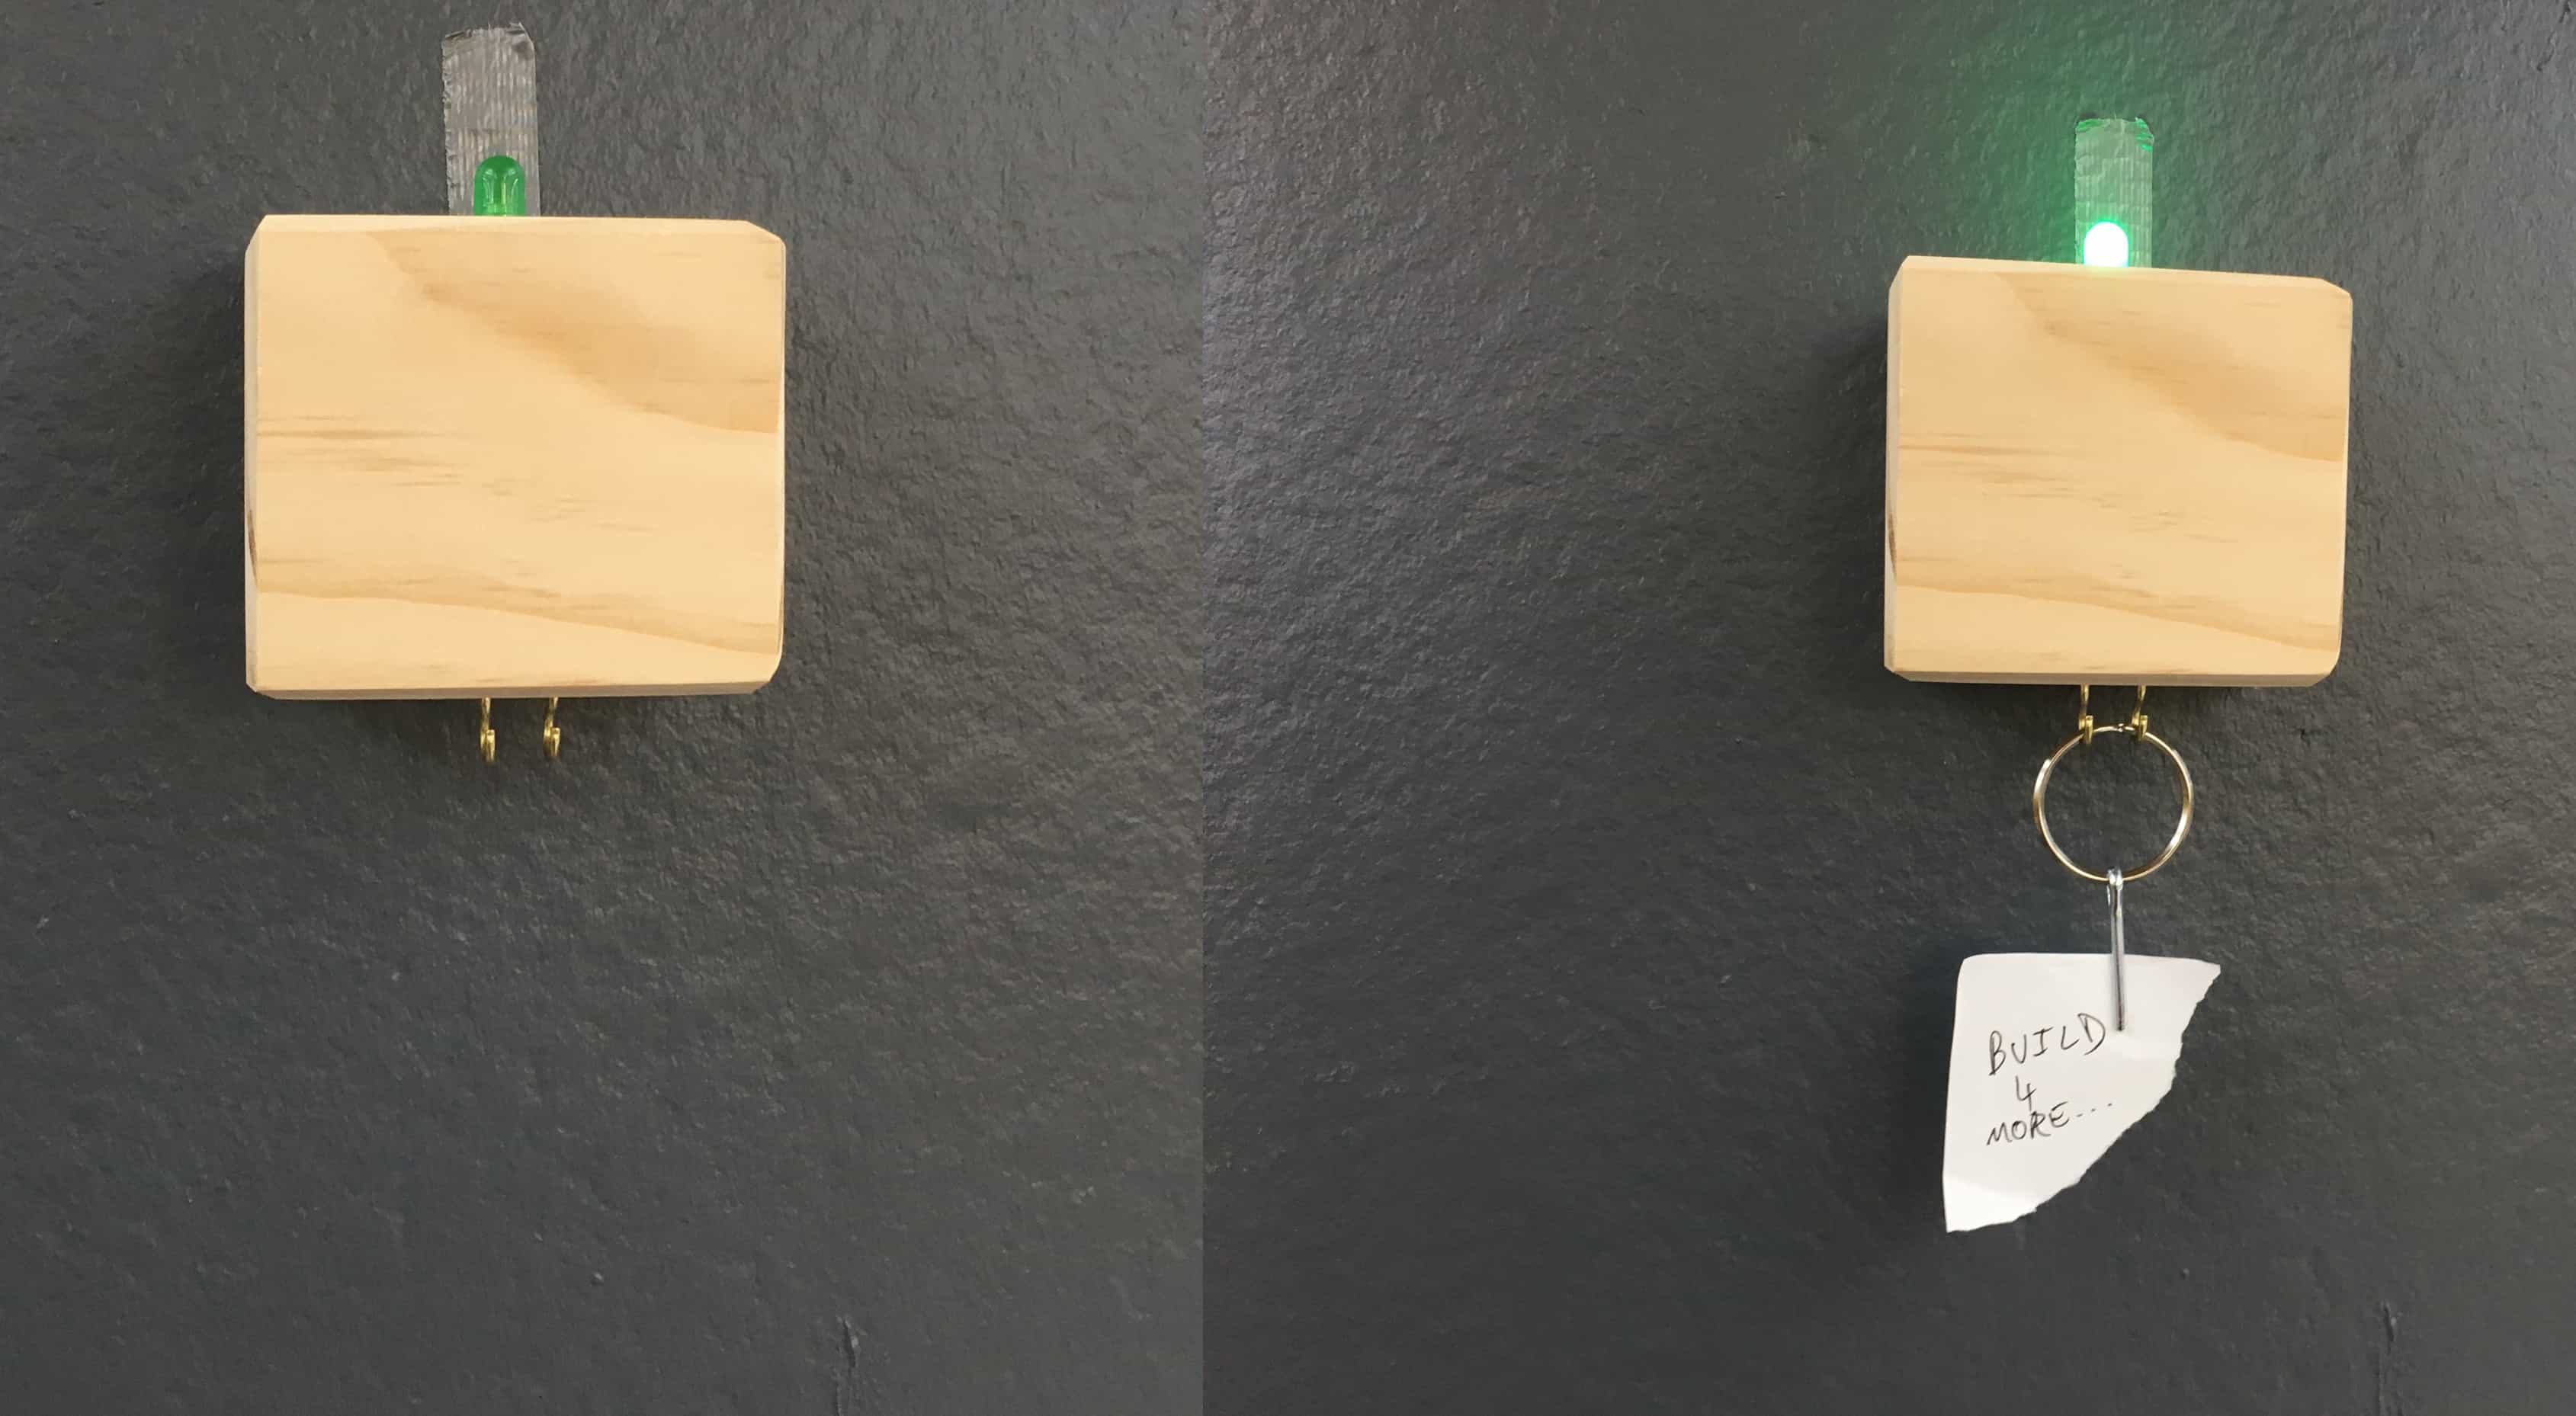
What is a Memory Box? Something I made up. The basic idea is it is a box you put on the wall next to a space you need to remember something. An example is ones keys by the front door. The box has hooks on the bottom that things can be attached to. When something is attached, a large LED on the top of the box turns on.
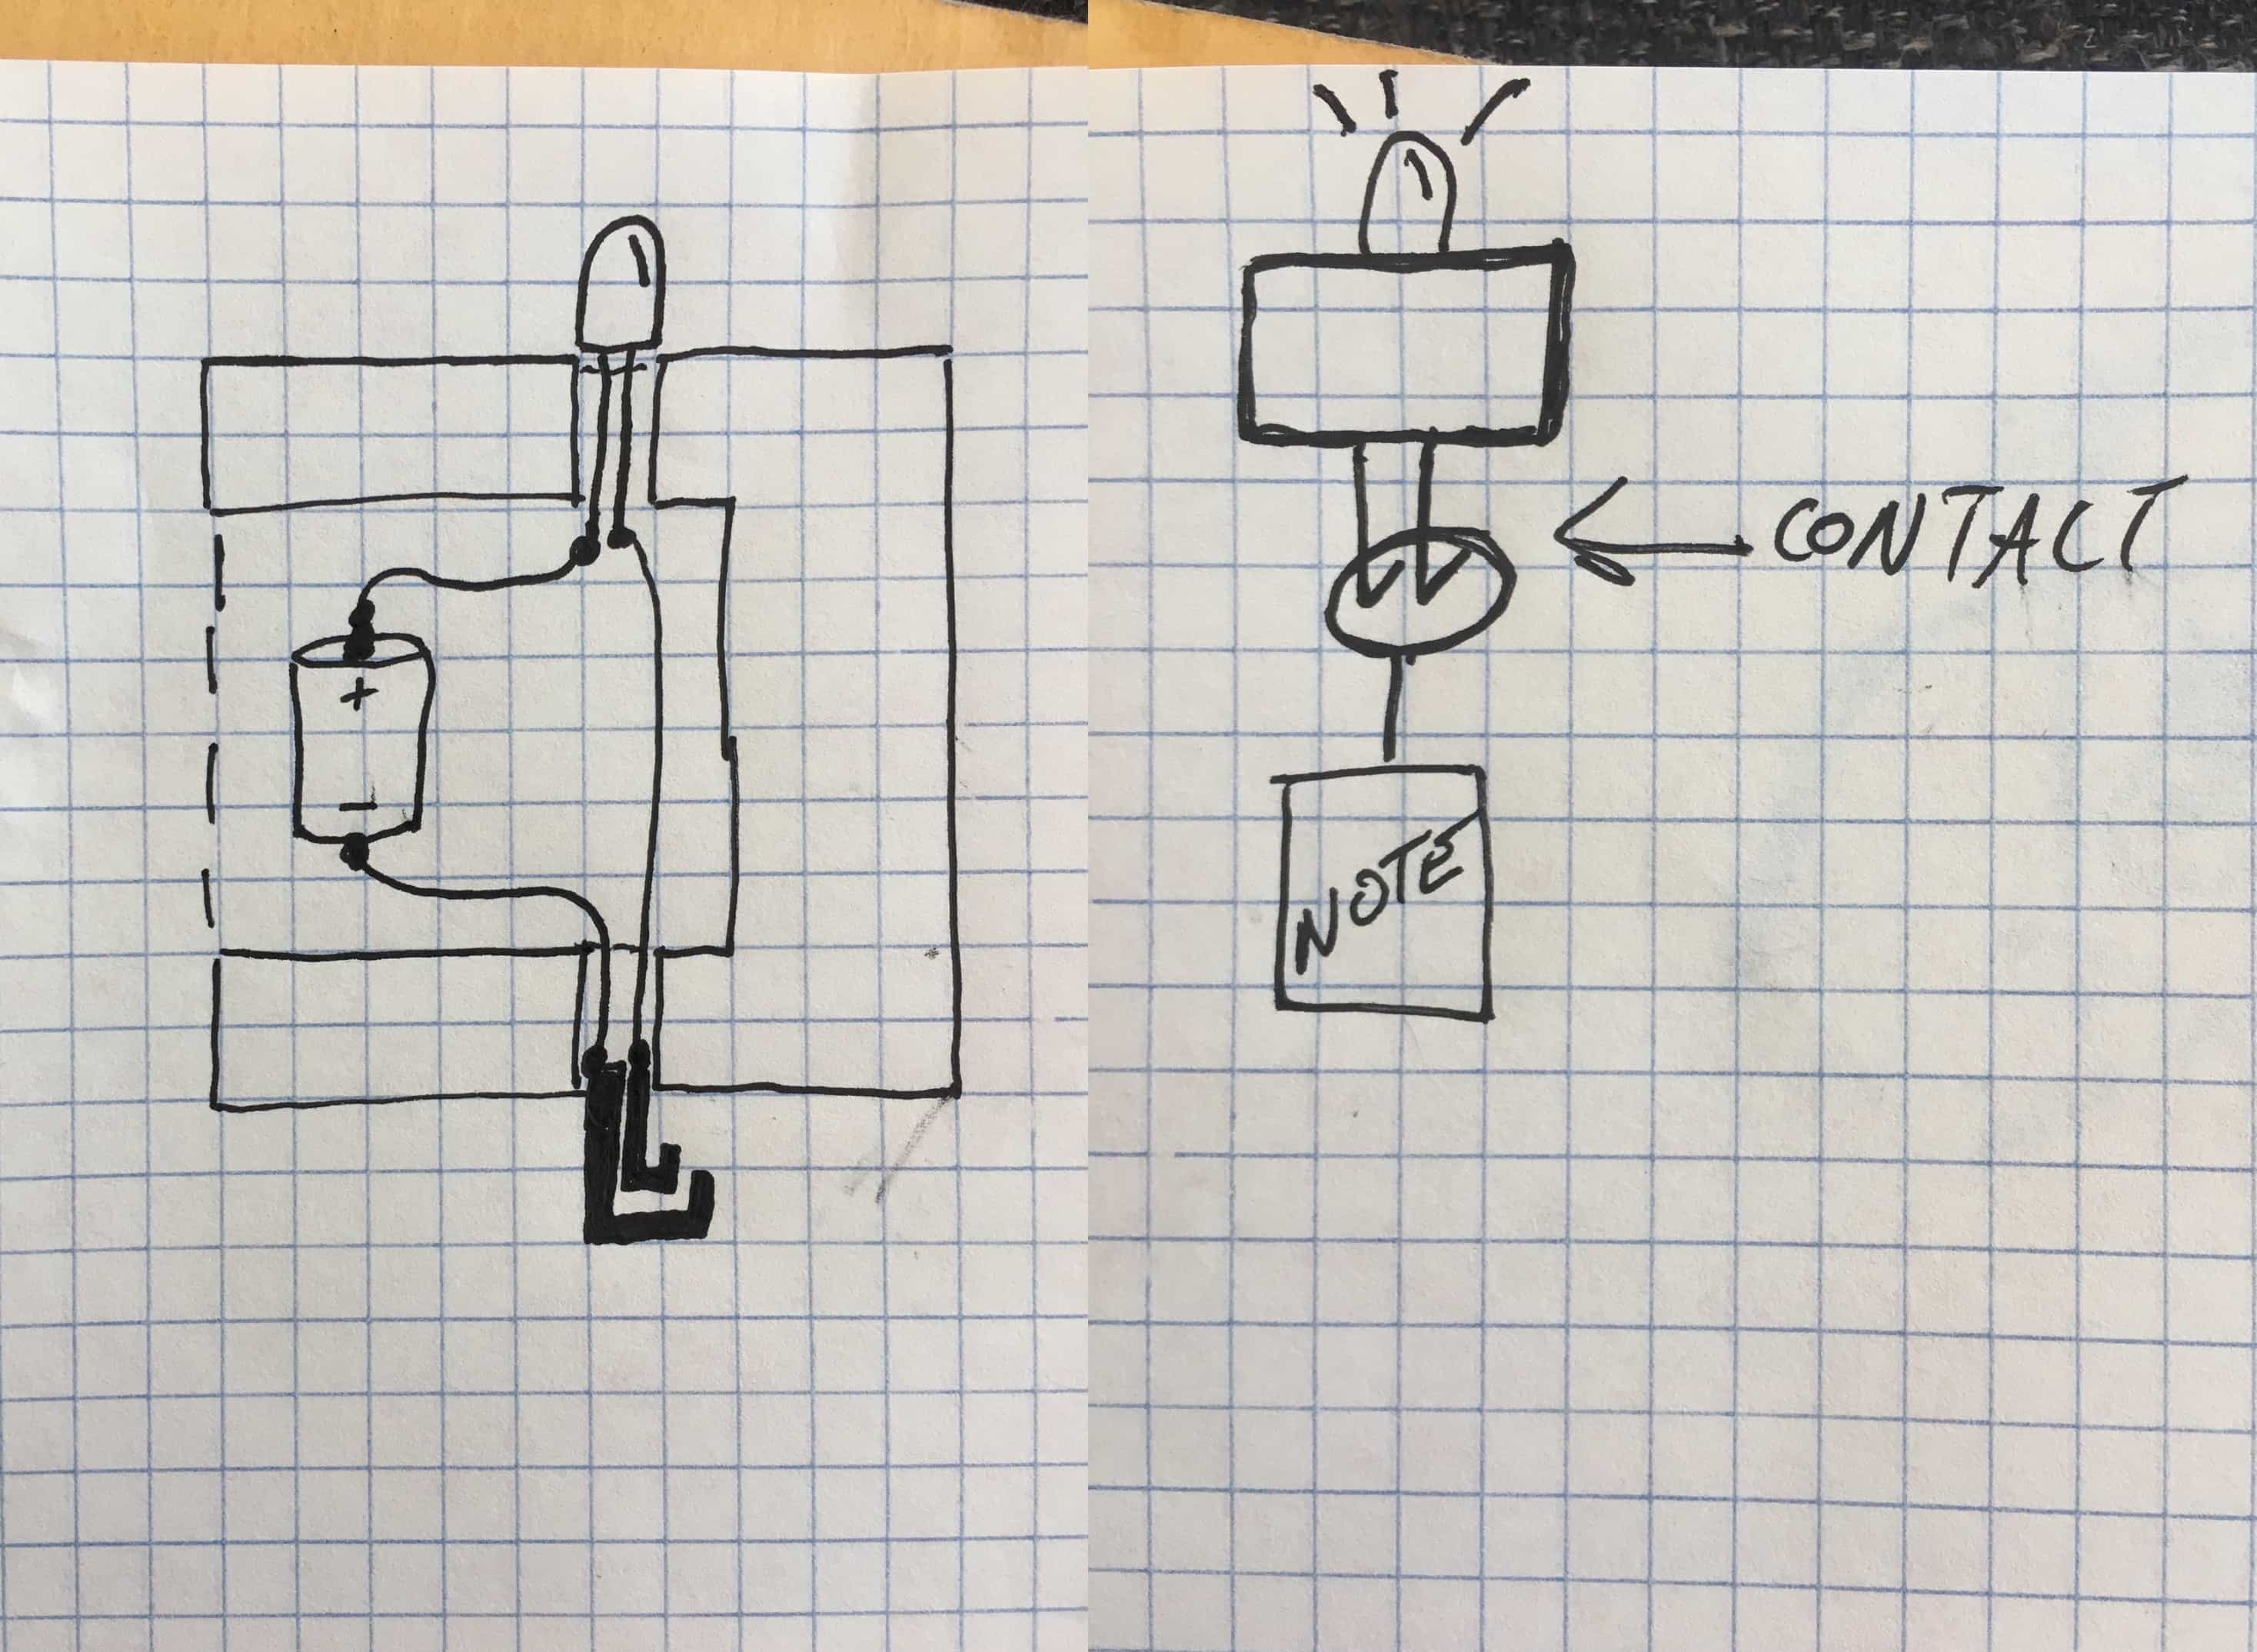
Drawings⌗
Materials⌗
- 5 Jumbo LEDs
- 10 Brass Screw Hooks
- Solid Core Wire
- 5 Key Rings
- 1 8’ L x 4” W x H 2” Lumber
- Wood Glue
- Picture Frame Hooks
- 5 Battery Button Holders
- 10 3v Button Batteries
Tools⌗
- Miter Saw
- Drill Press
- Hot Glue Gun
- Soldering Iron
- C-clamps
The Process of Building⌗
Boxes from Wood⌗
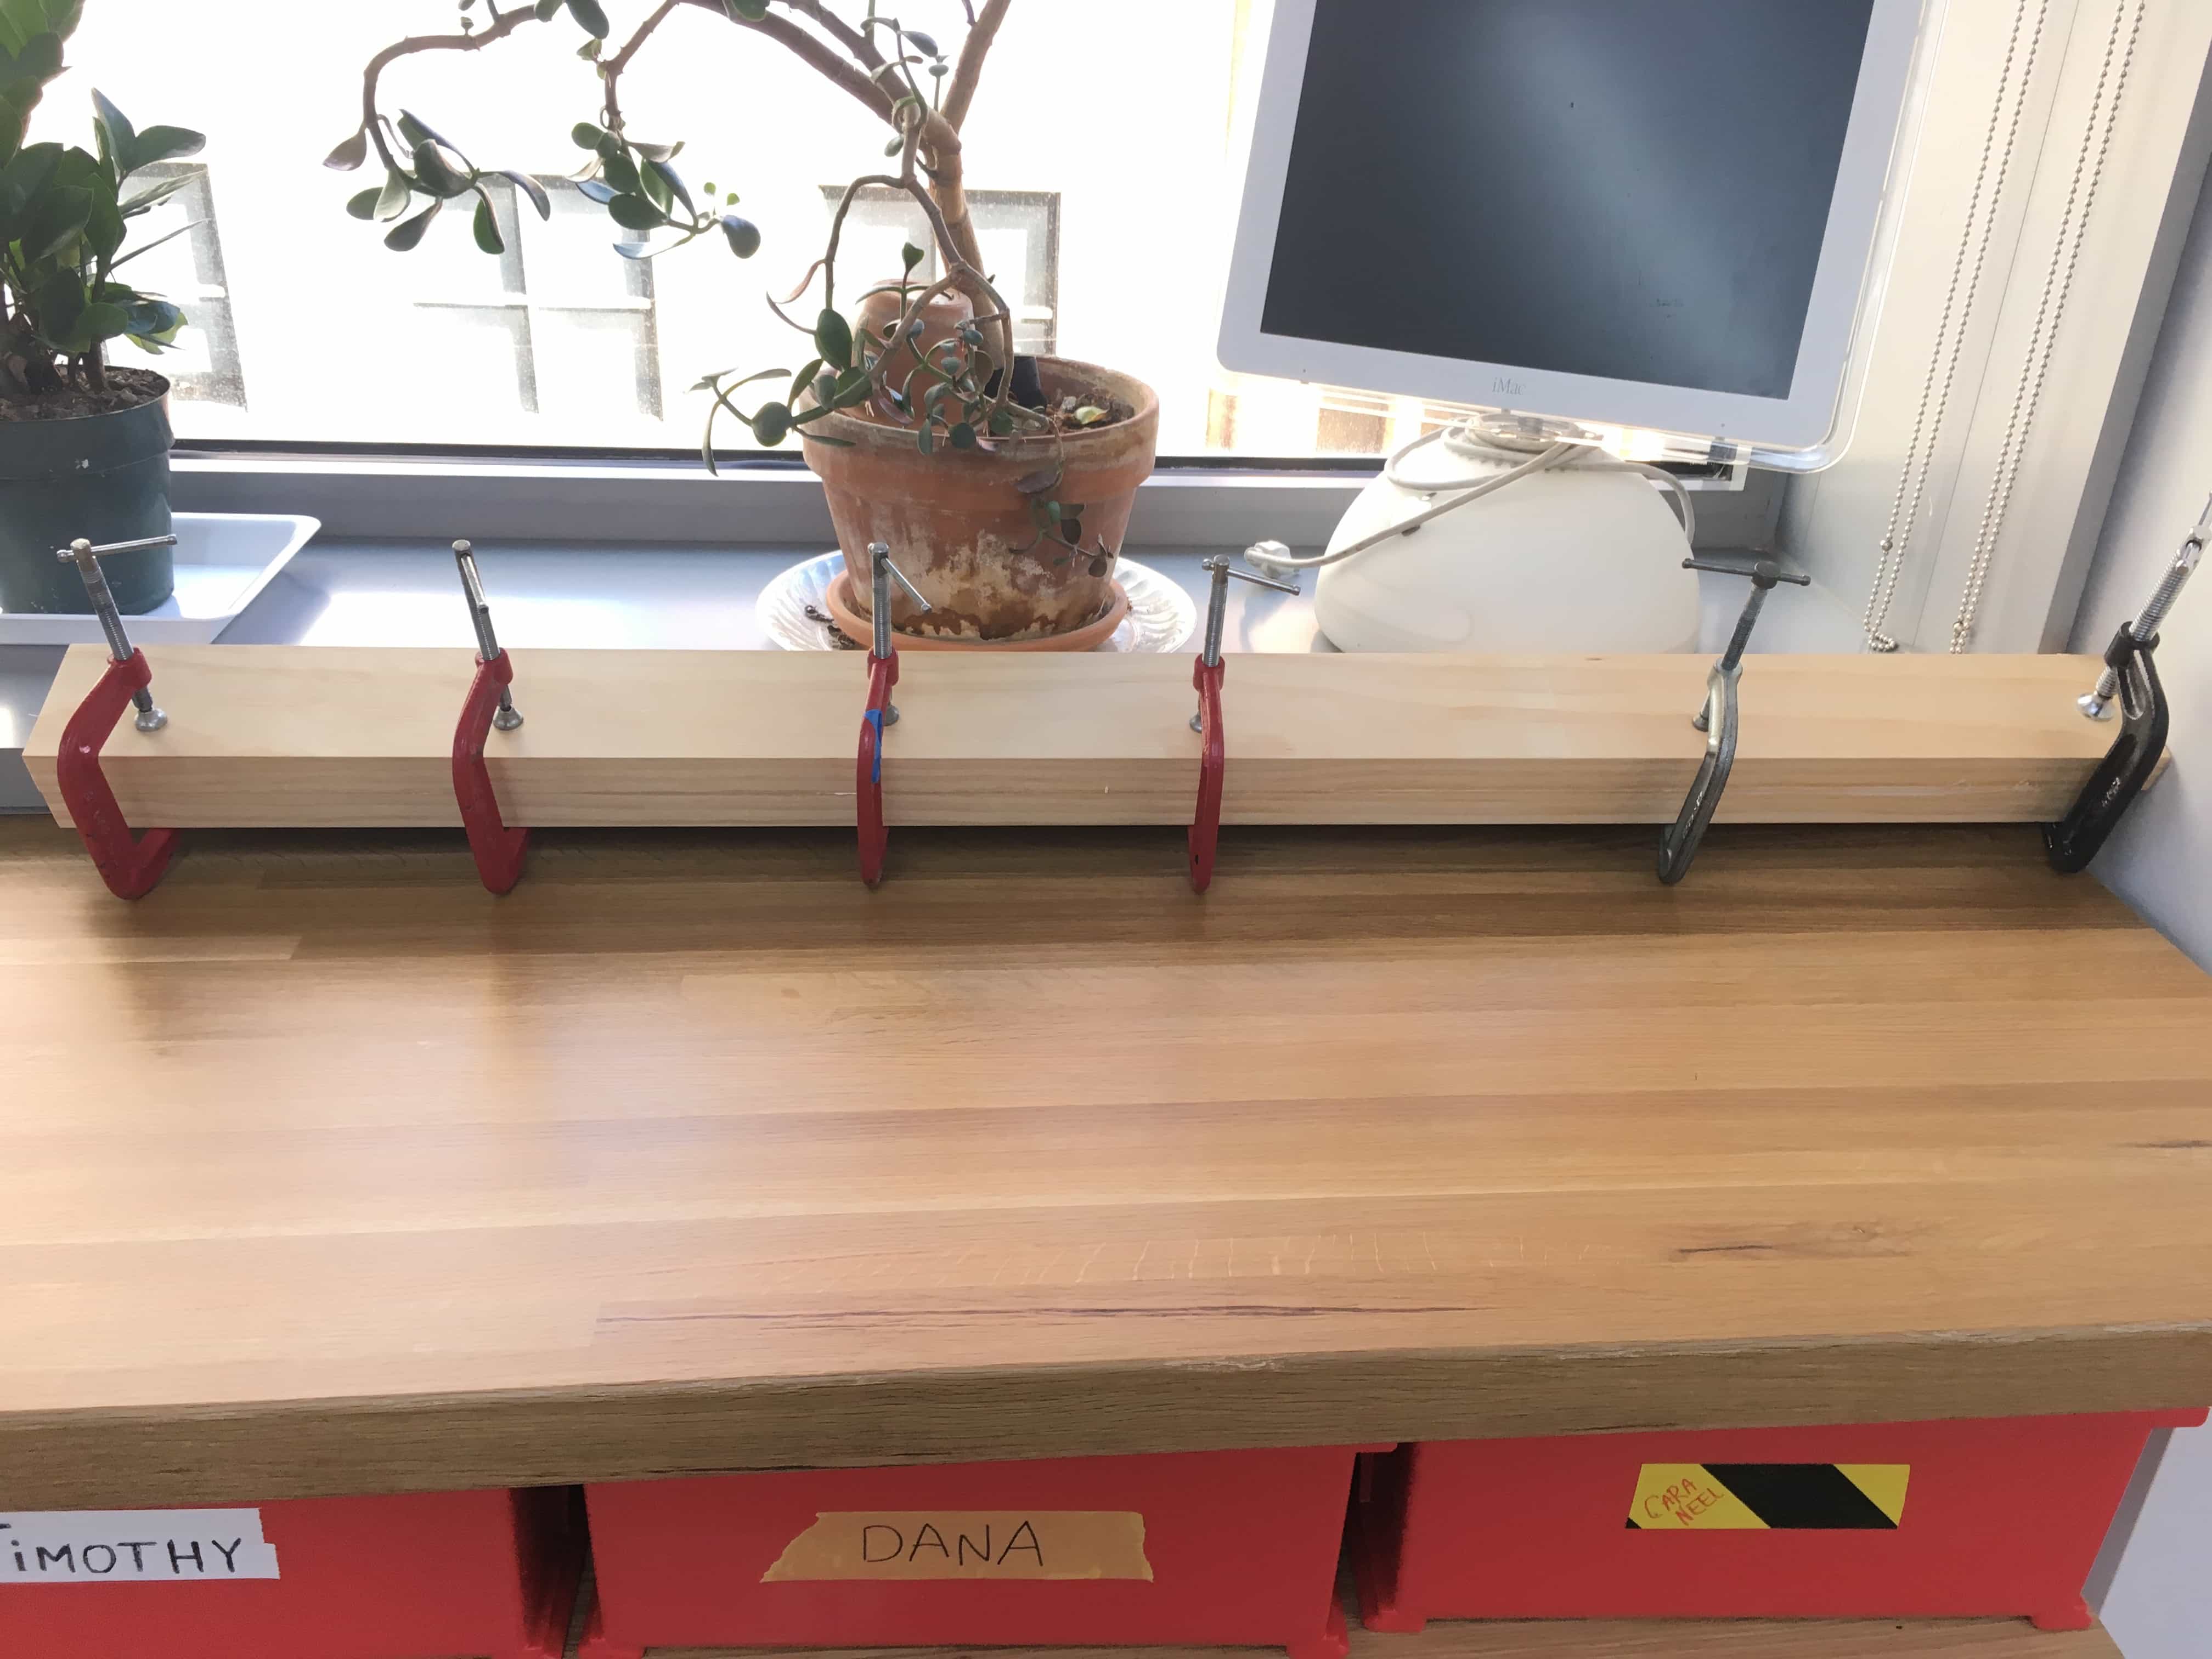
To start, I needed to connect the two halves of wood to make a block that was 4’ long, 4” wide, and 4” tall. Using wood glue, I connected the two halves together. I held them tight with many c-clamps. I let it site for about 6-8 hours.
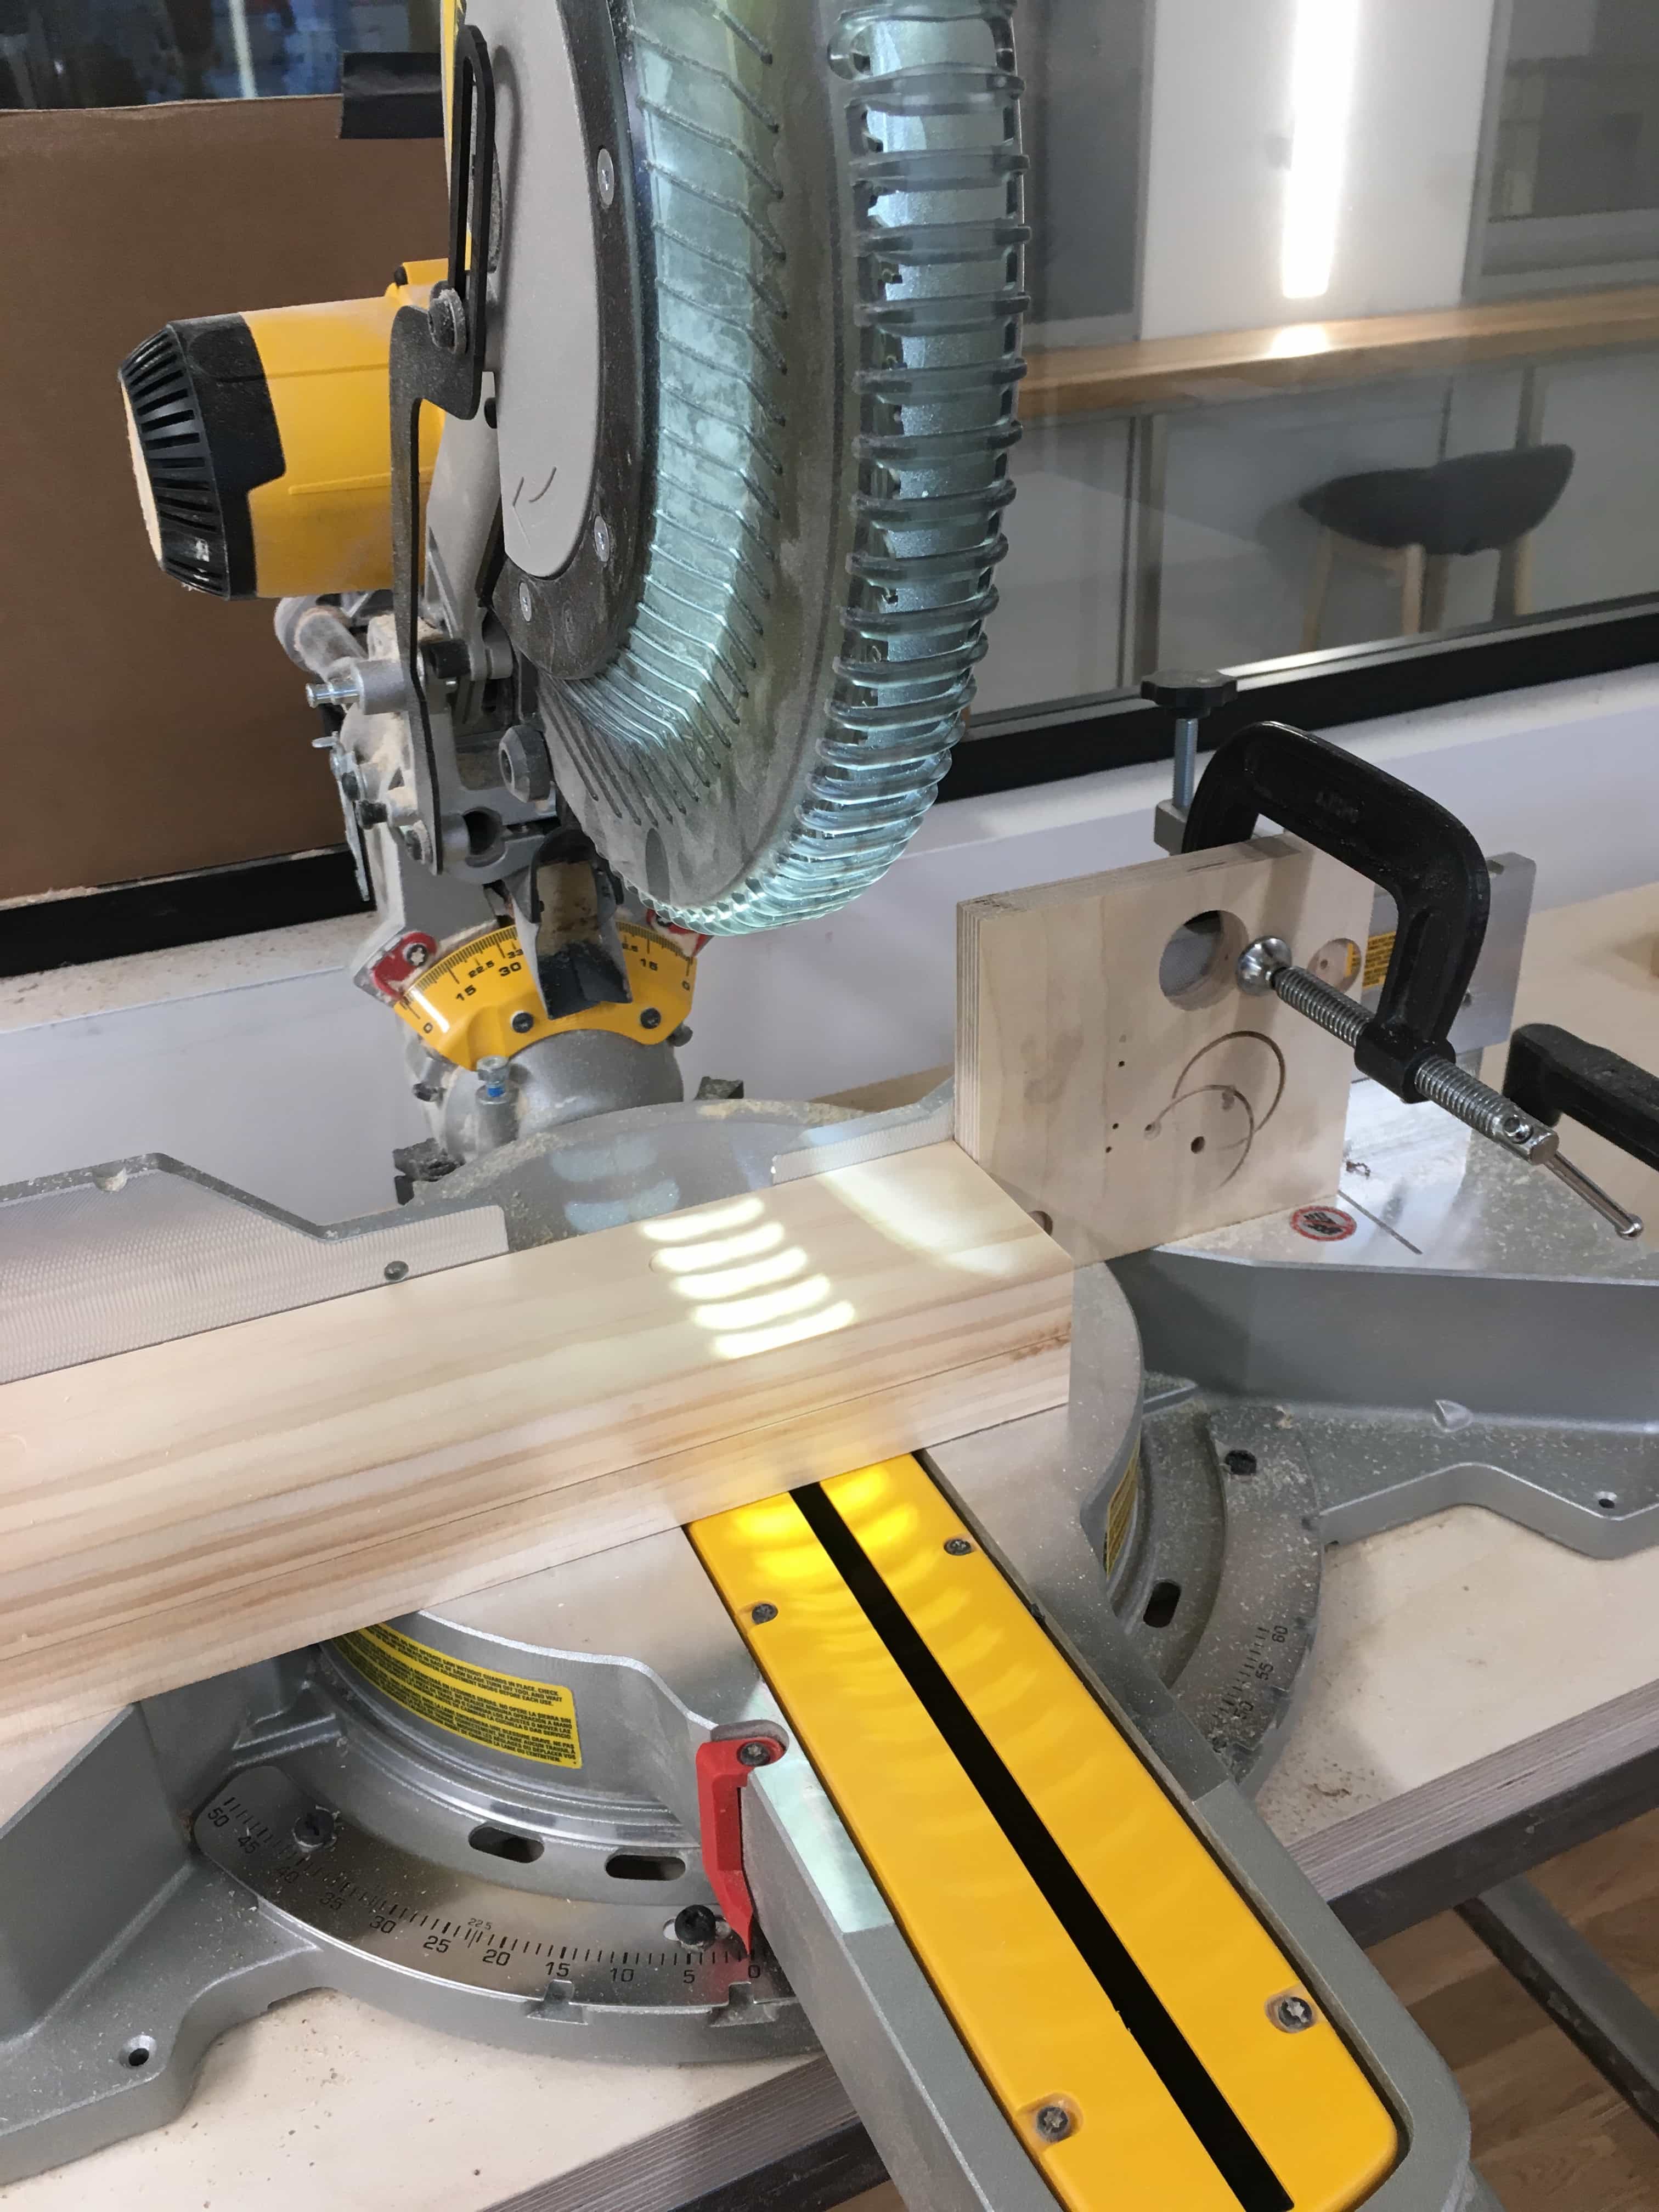
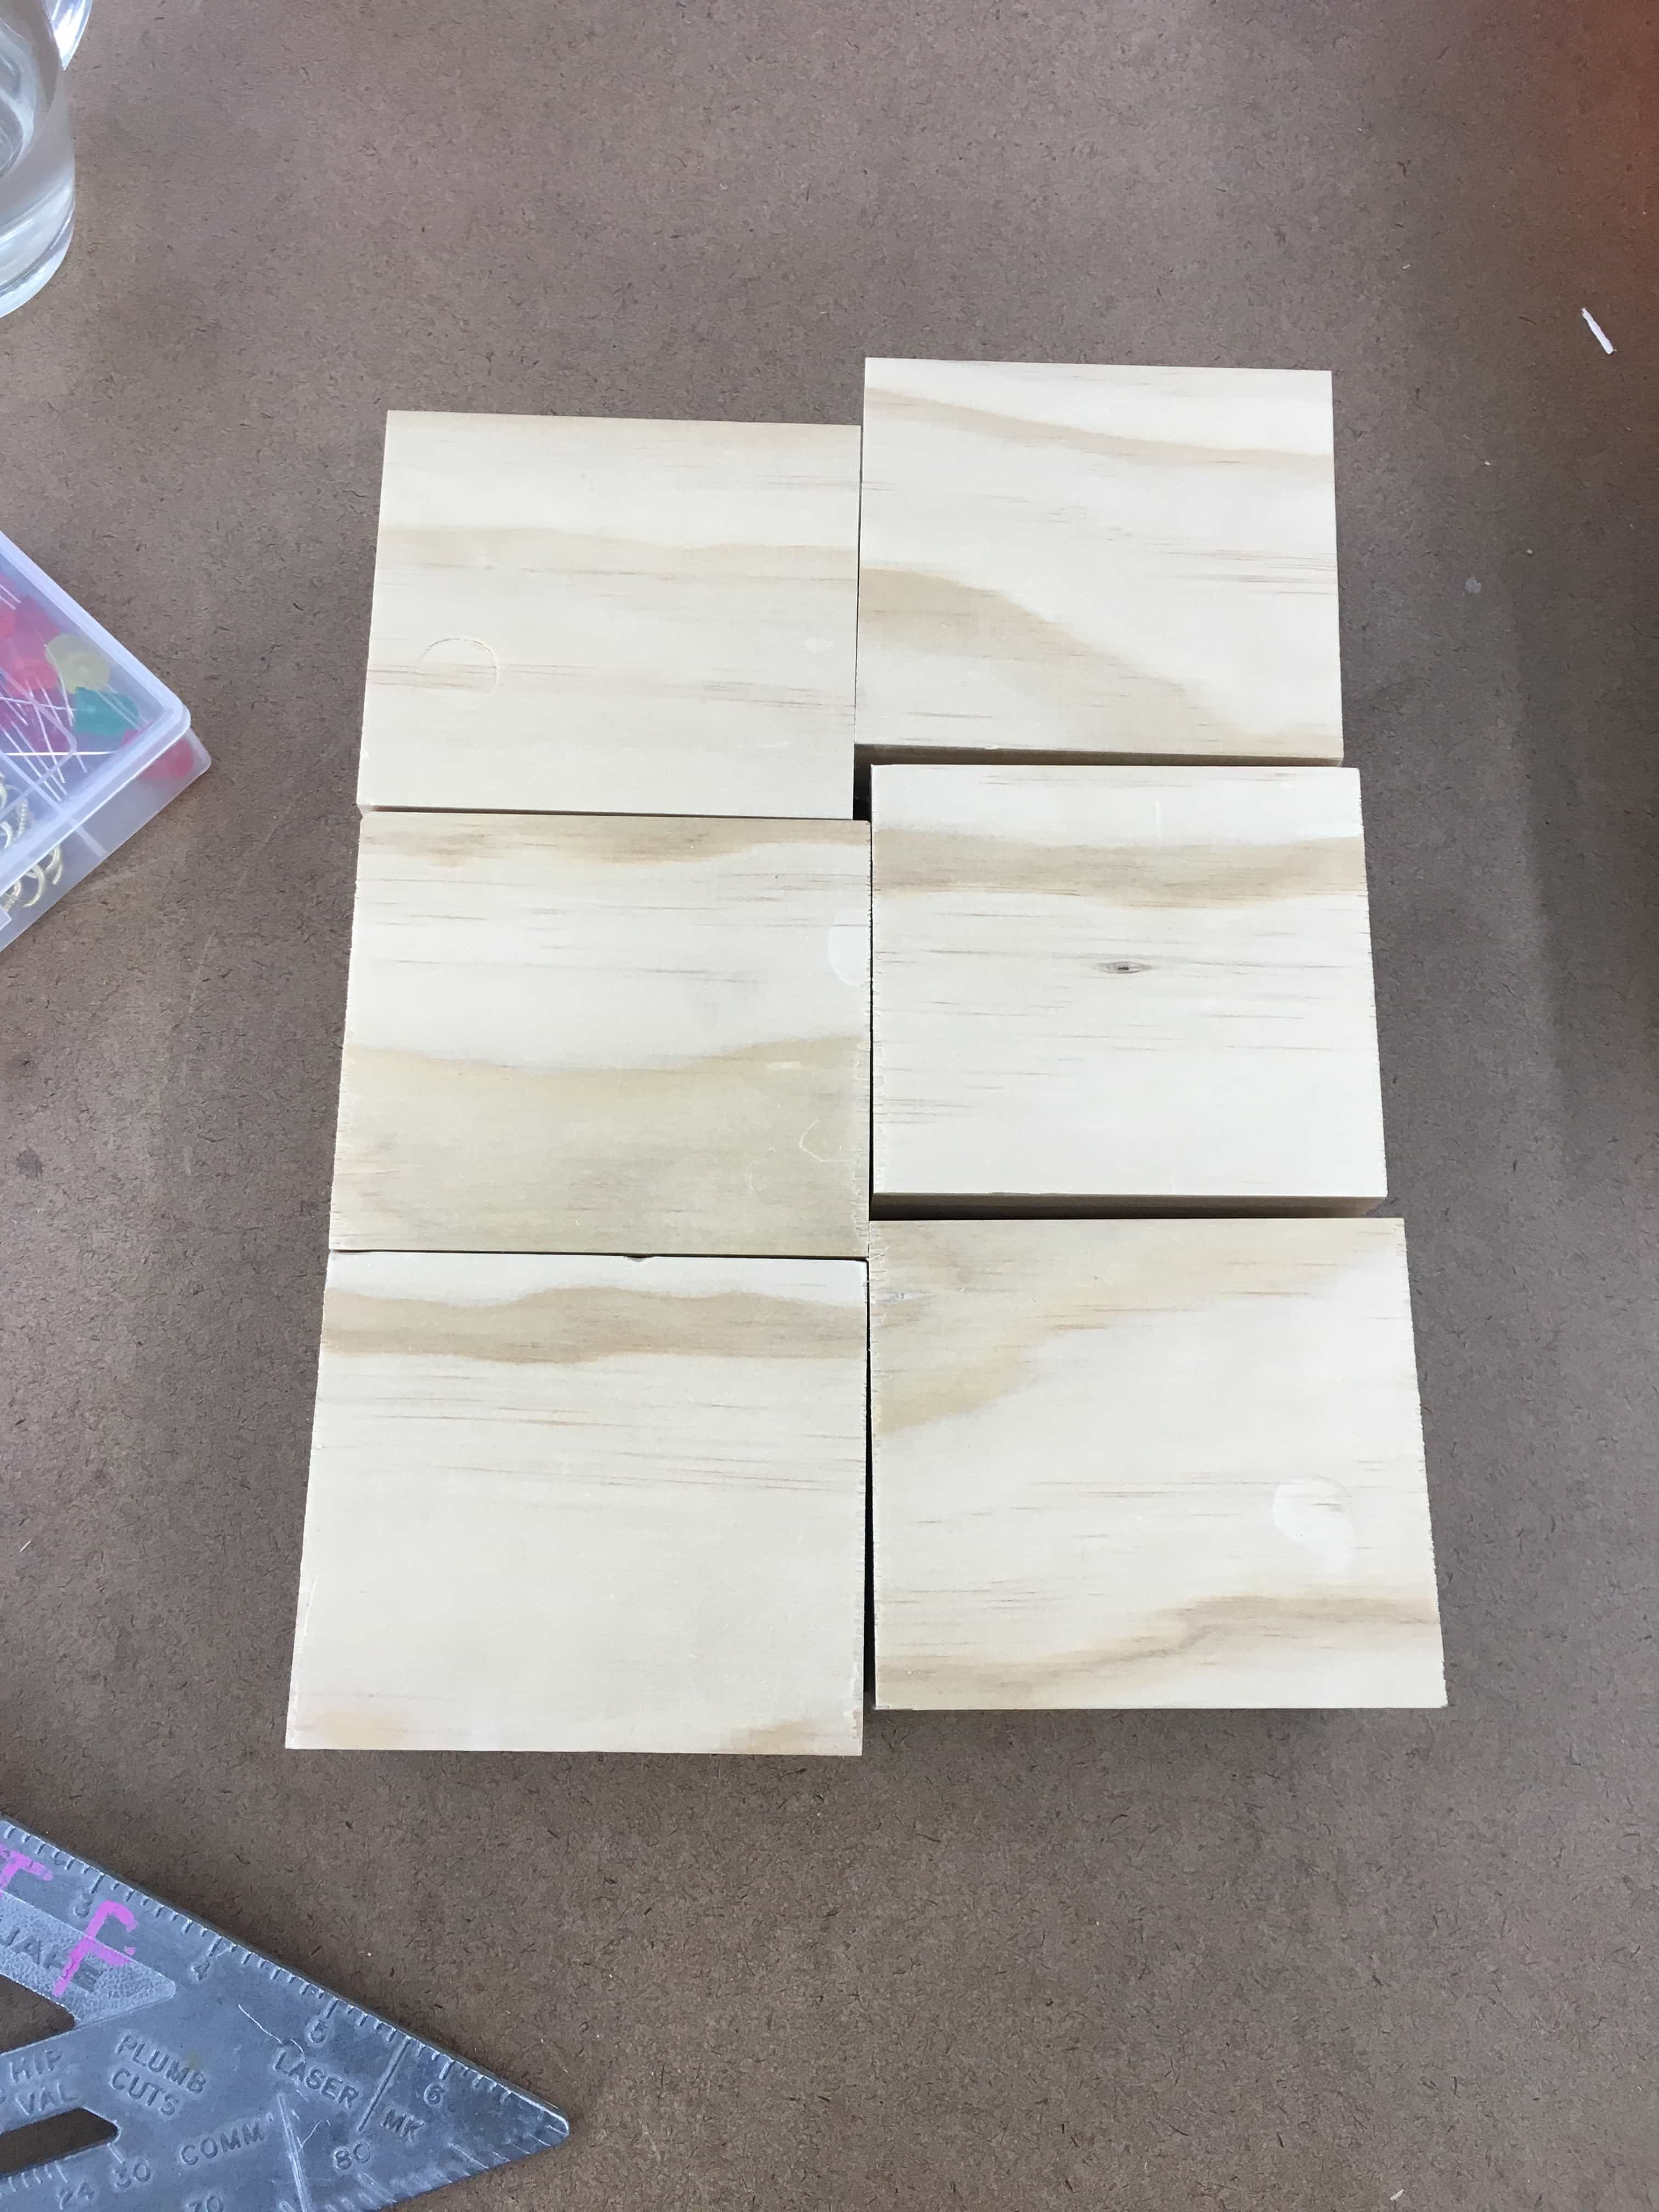
After the glue set, I needed to cut the lumber into cubes. I measured out 6, 4” blocks. I then used the miter saw to cut.
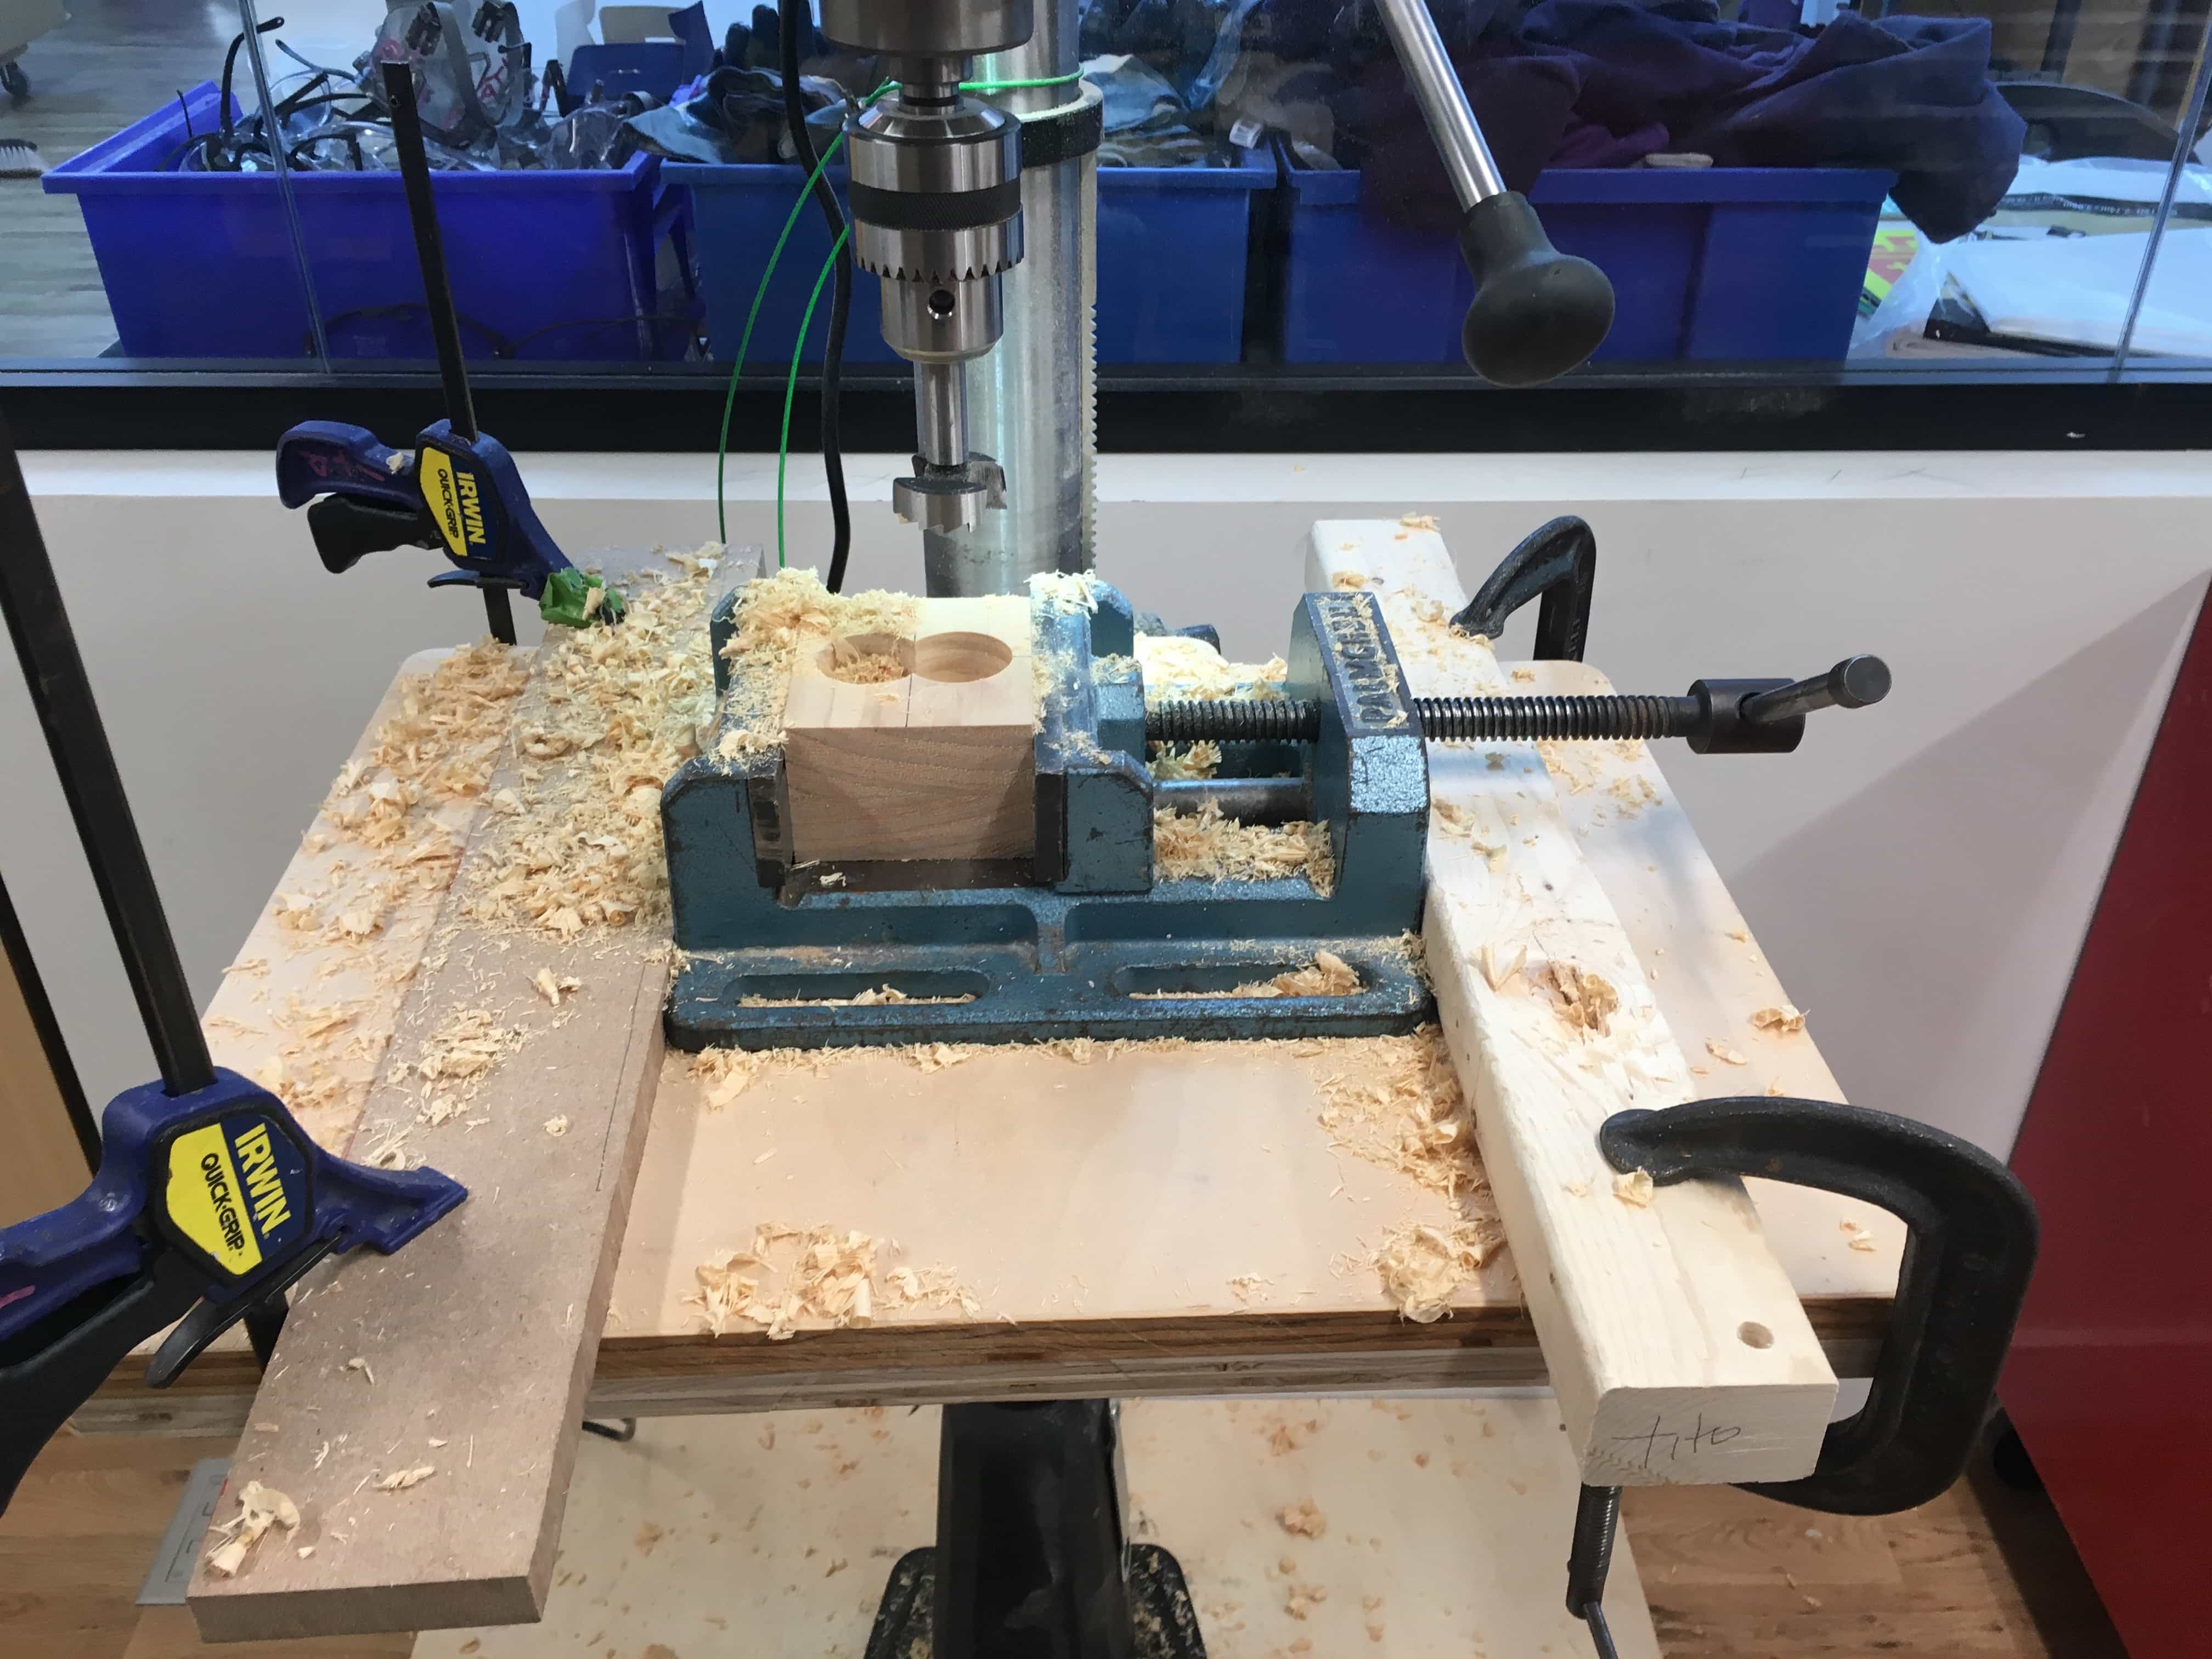
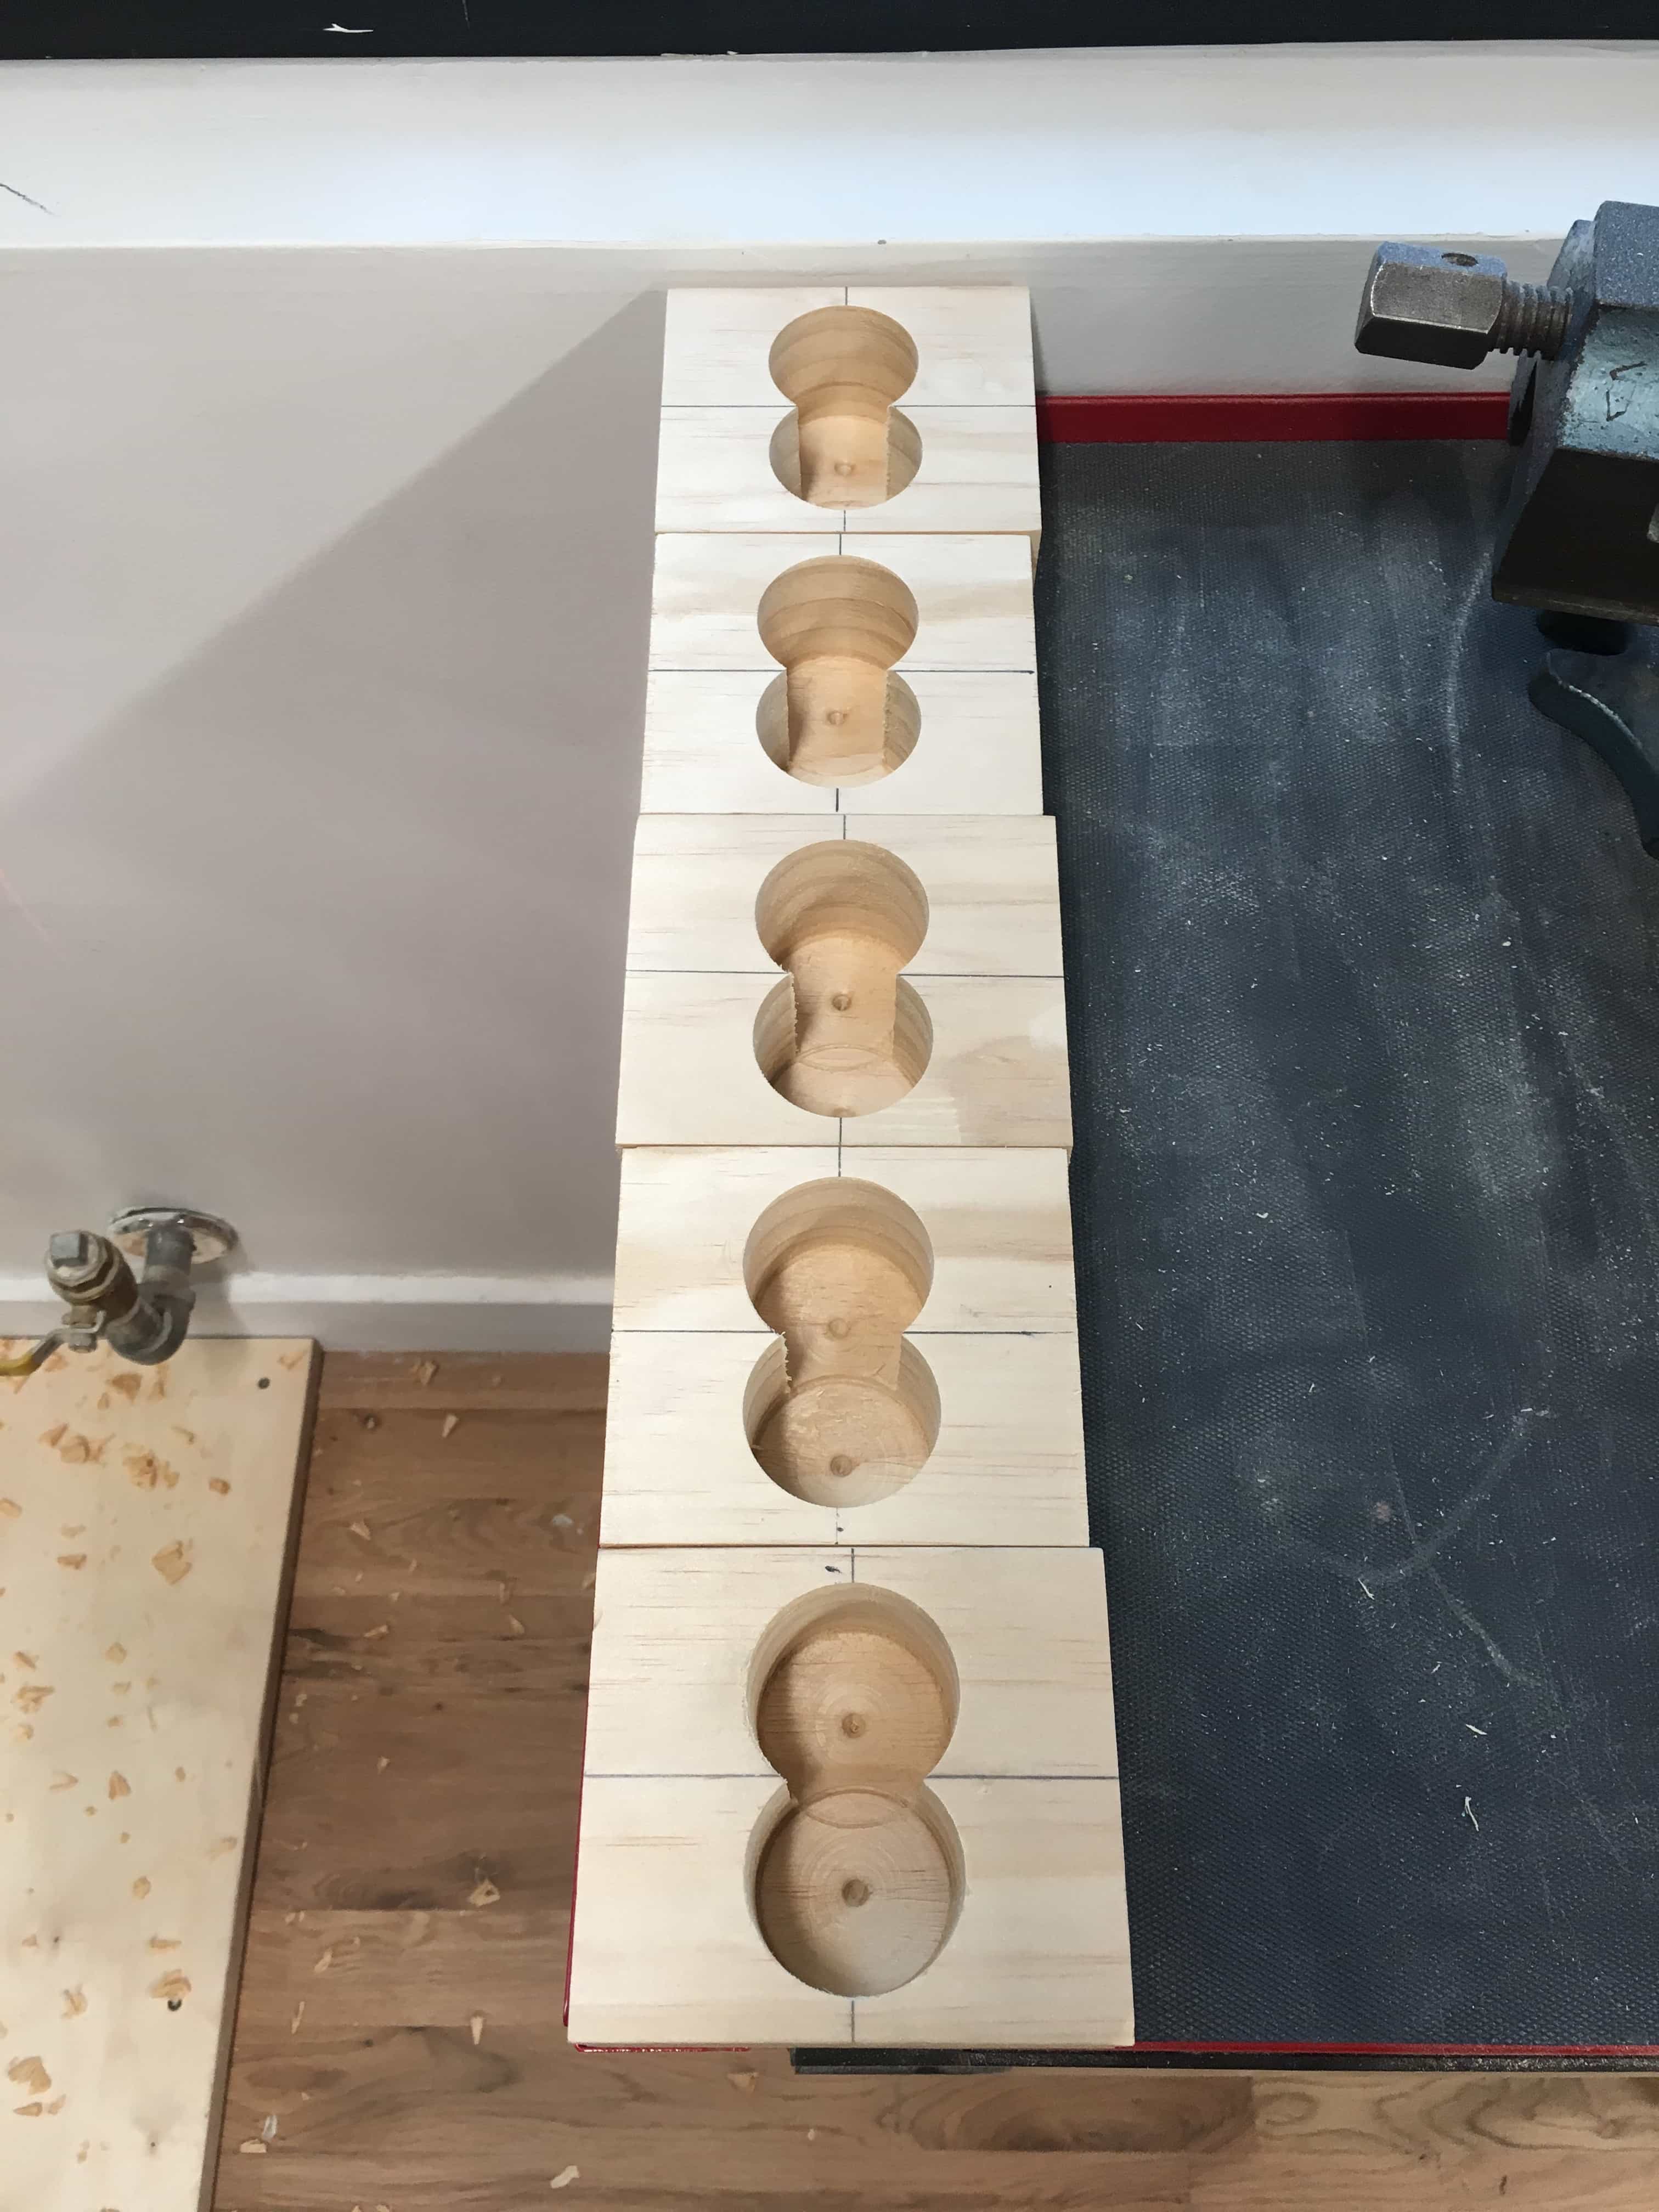
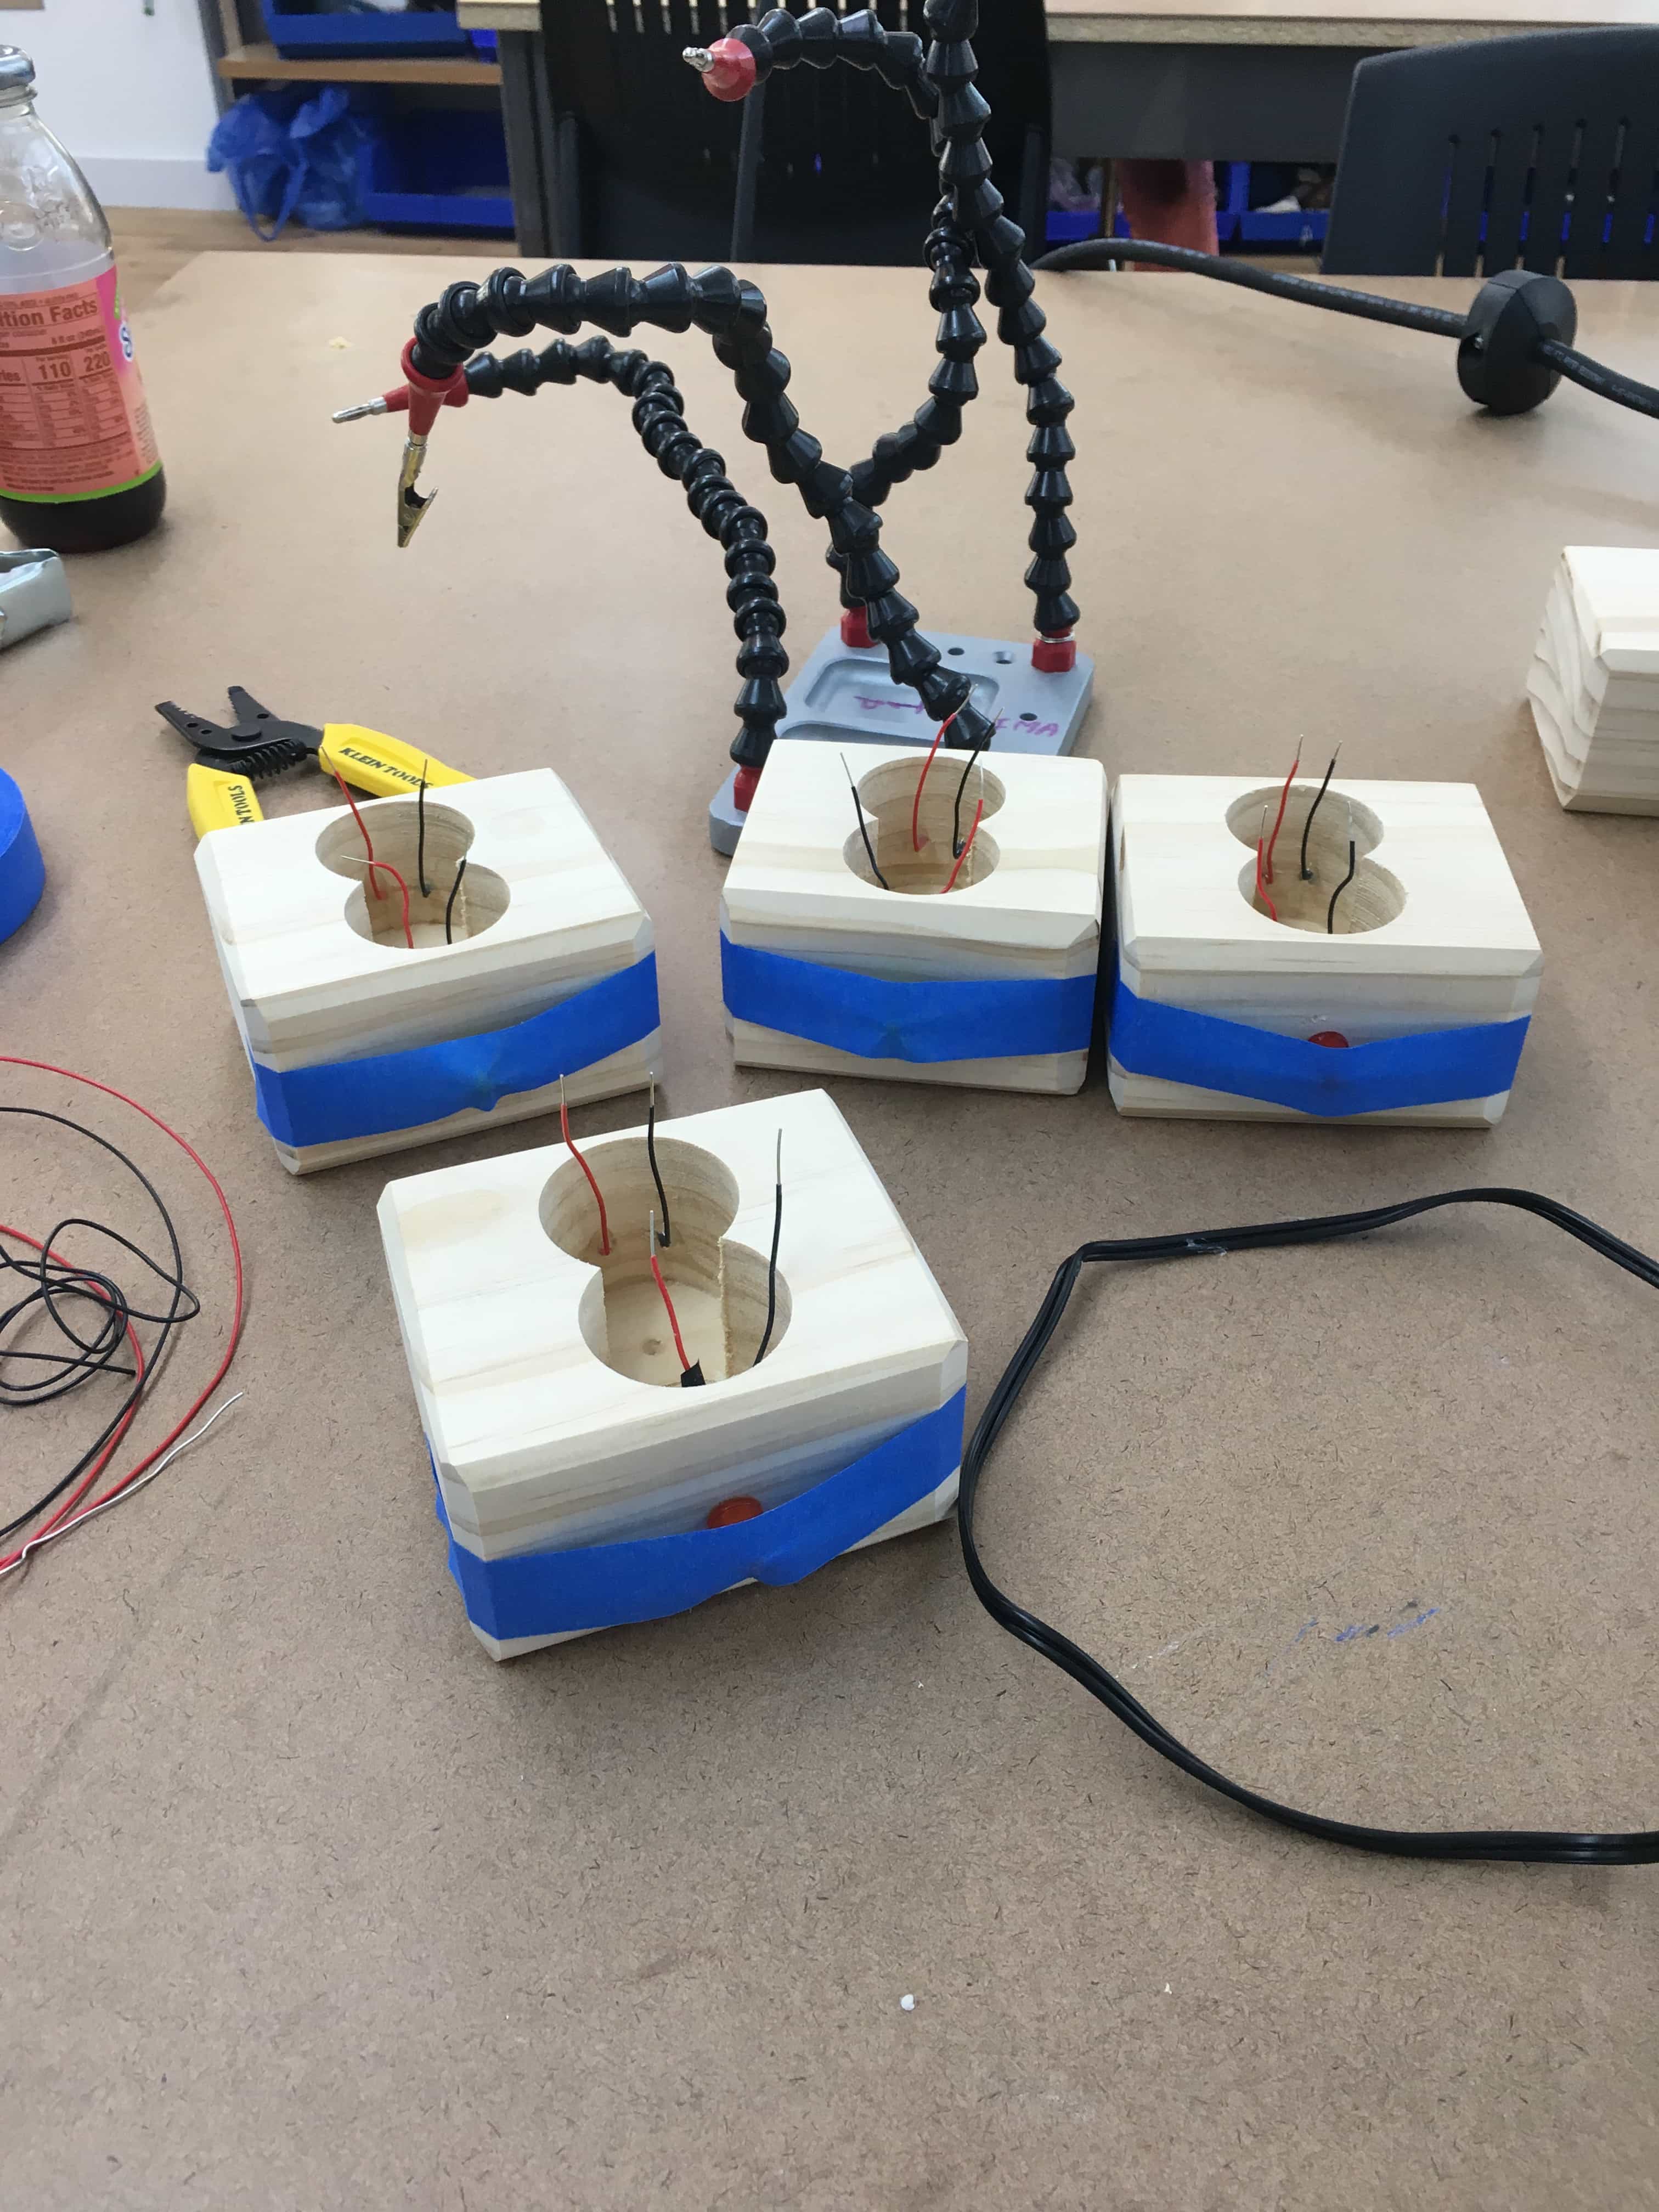
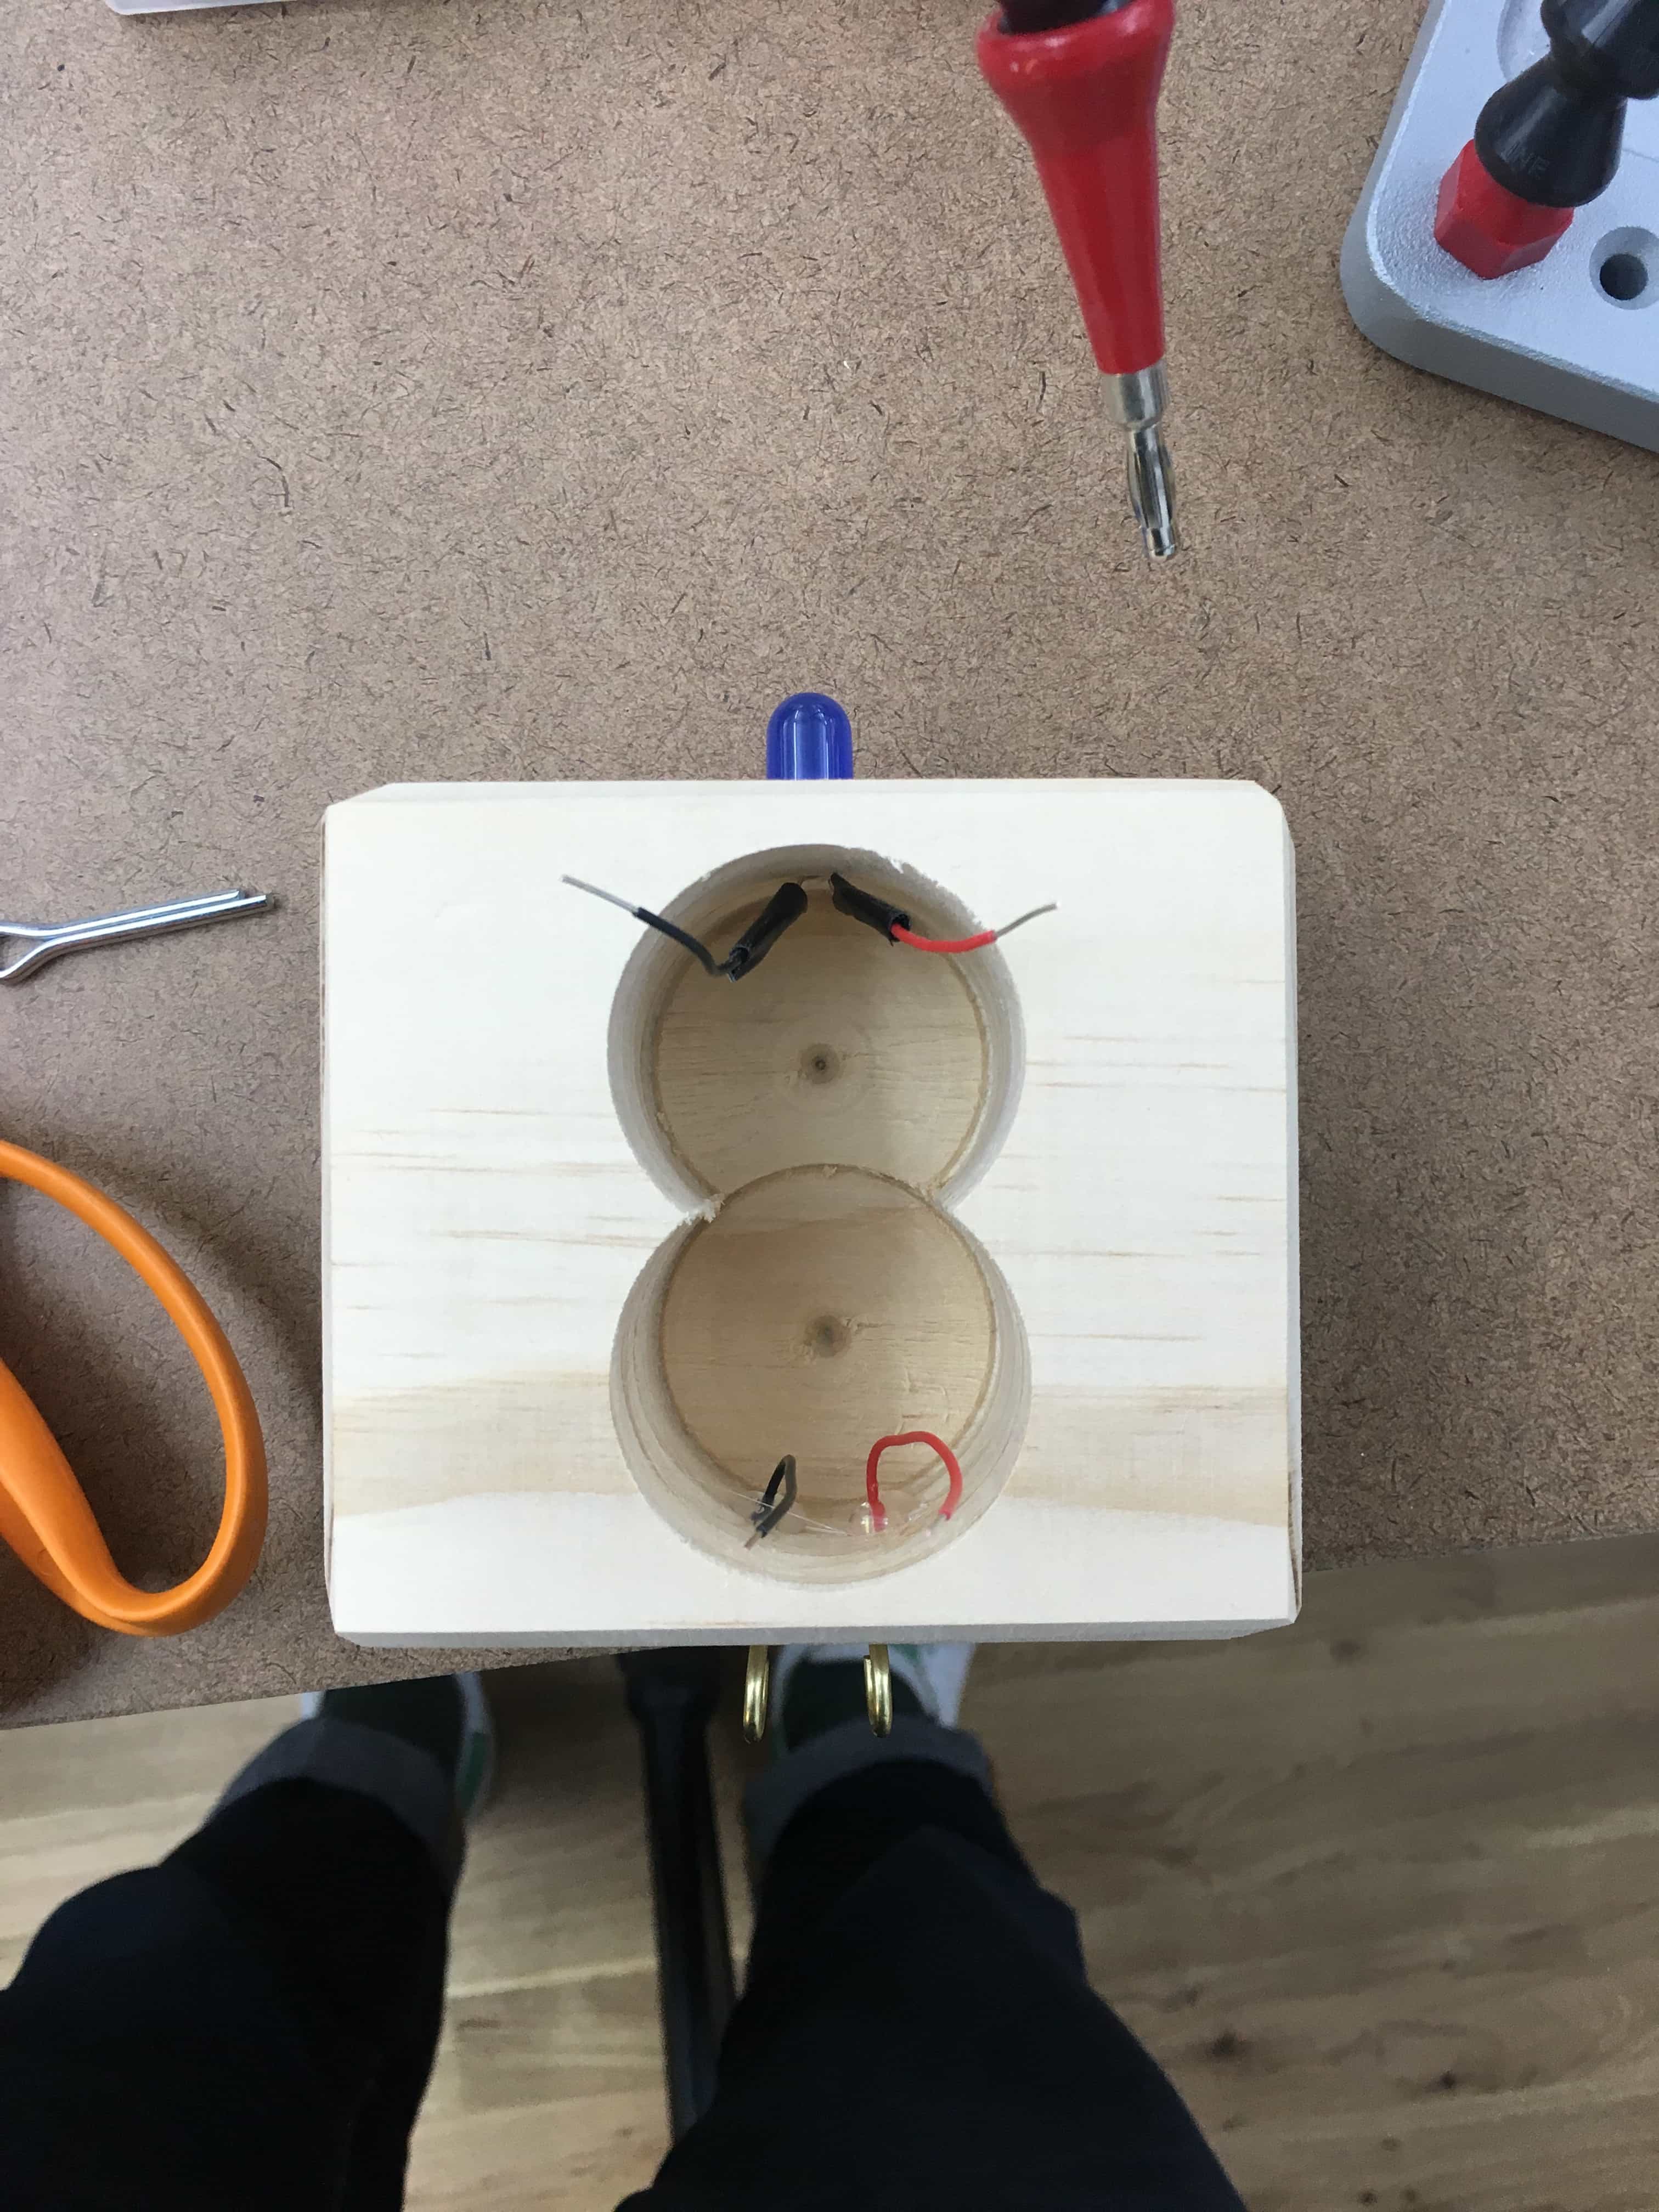
Next, I needed to make space in the back of the blocks. This space is for the electronics and batteries. I used a forstner bit with the drill press to drill two holes into the back of each block. The holes went 2/3 into the blocks, and overlapped to create a bigger space.
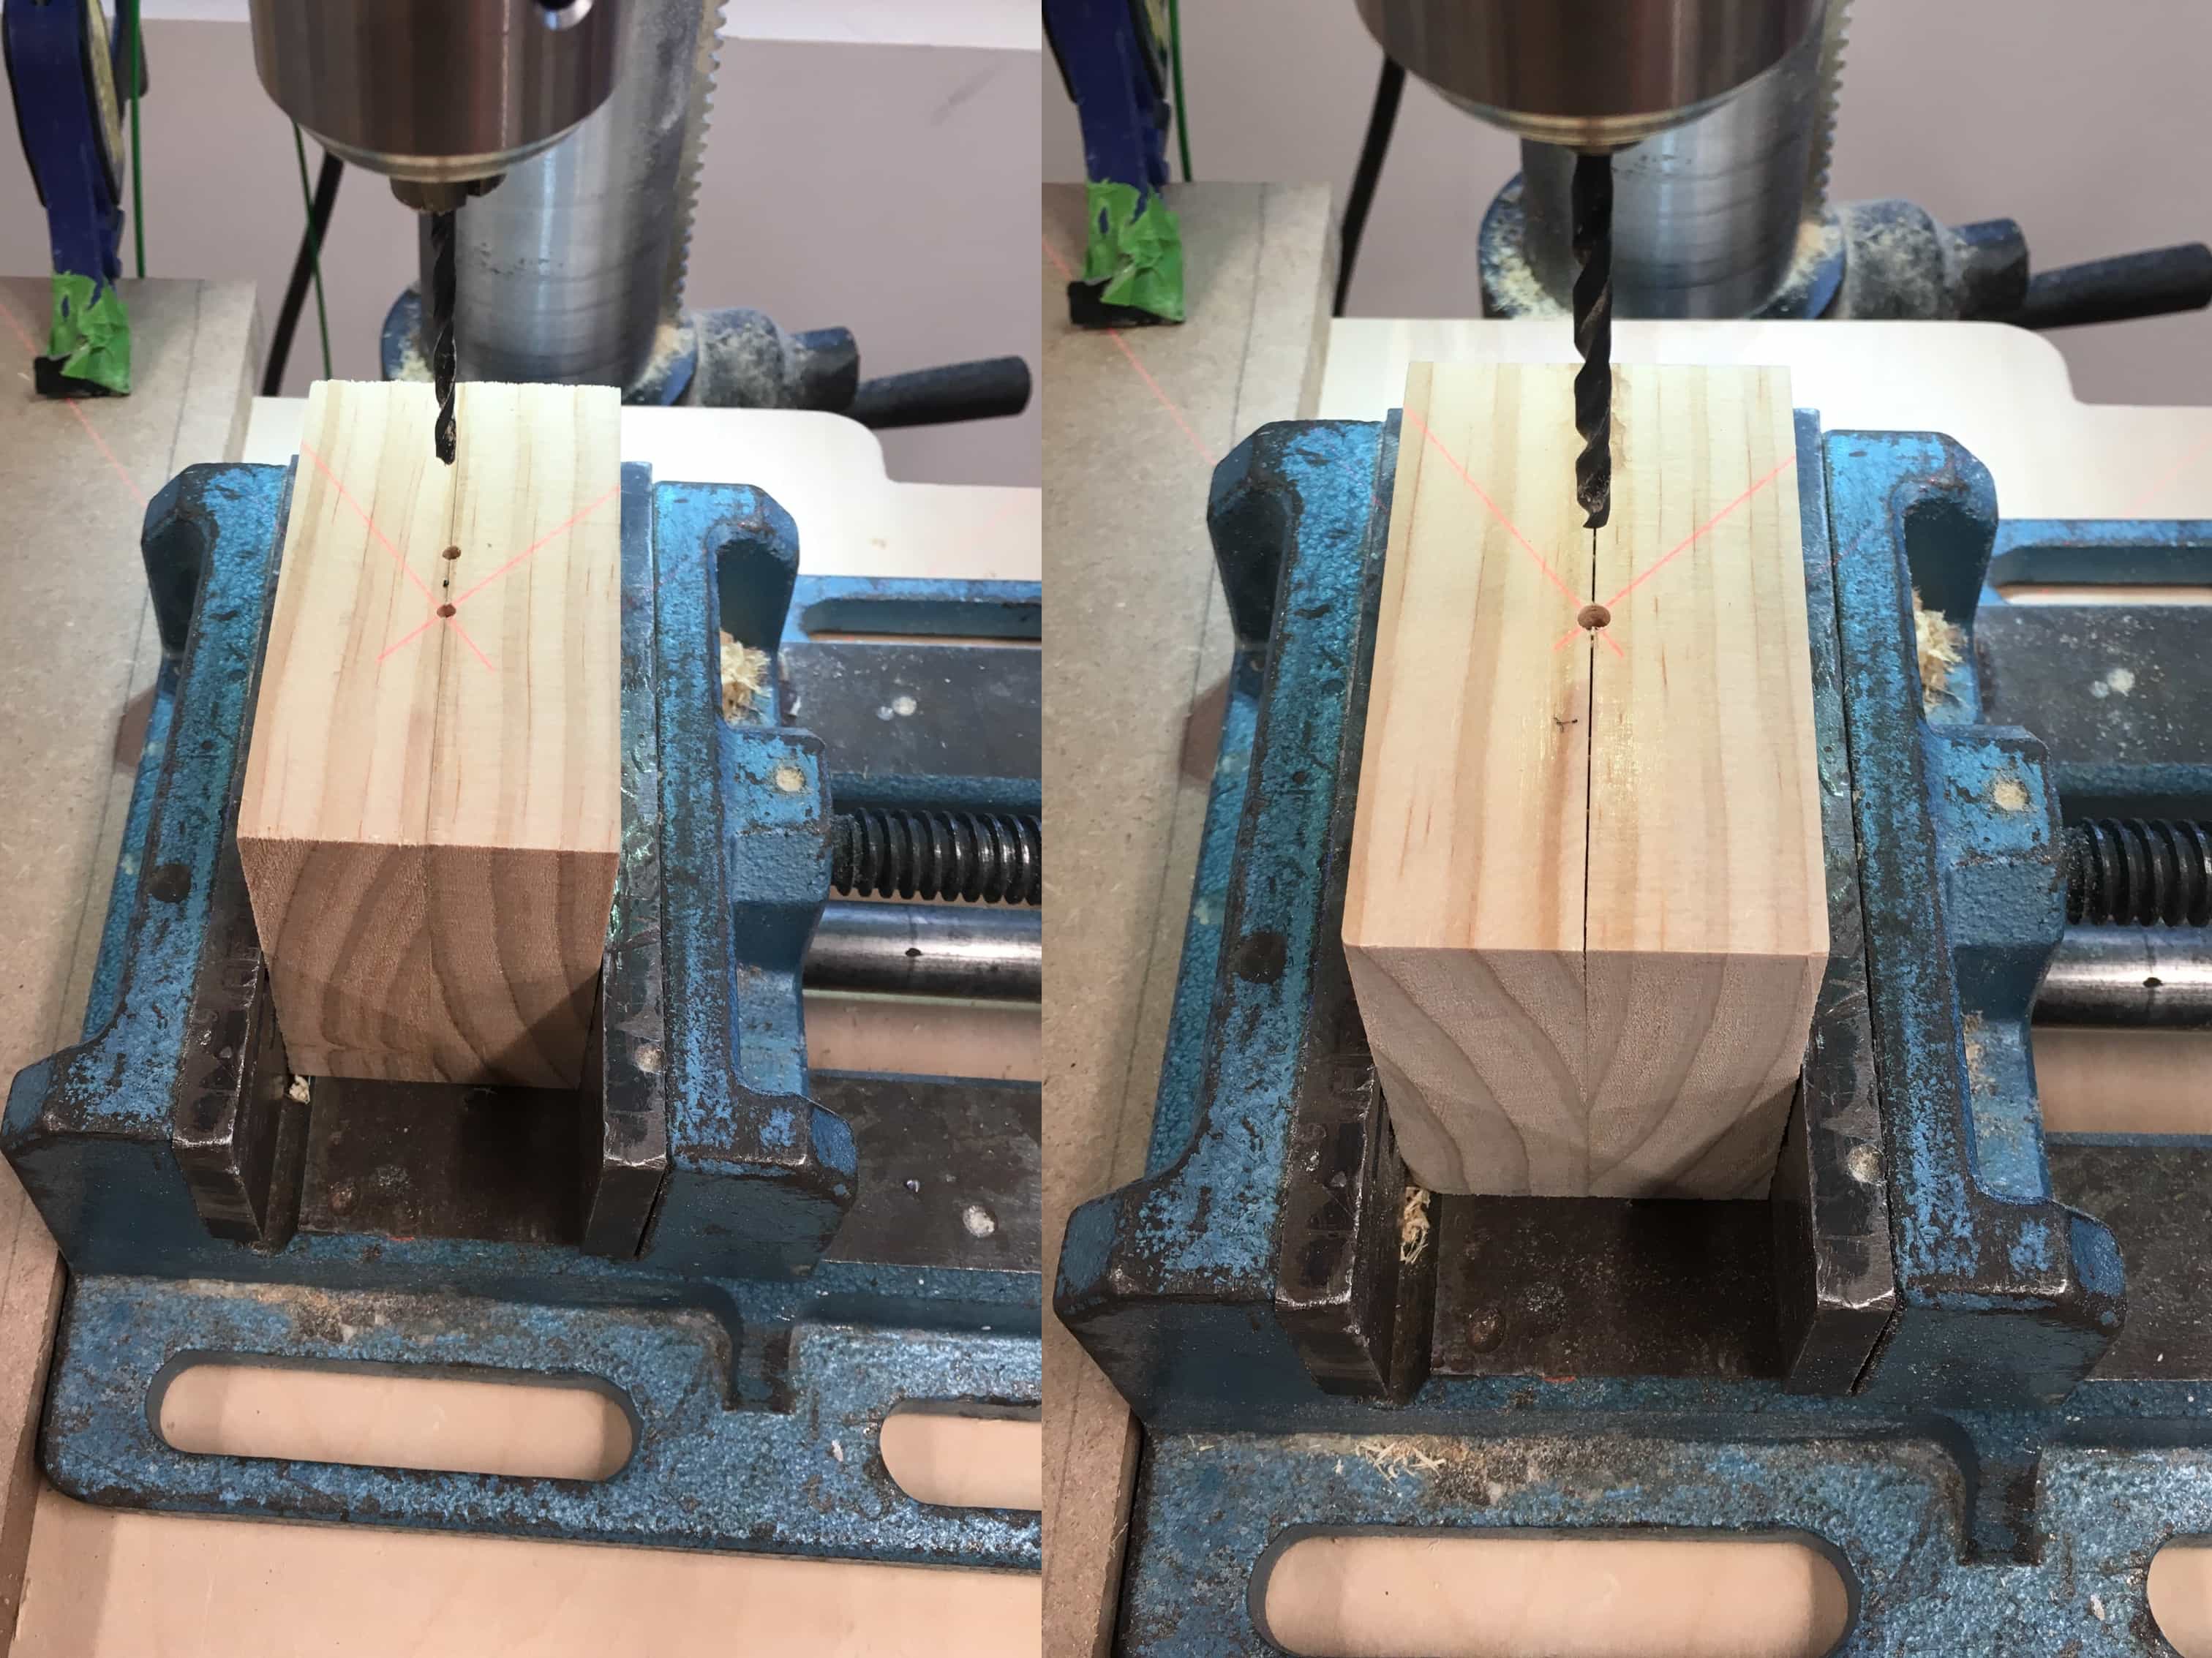
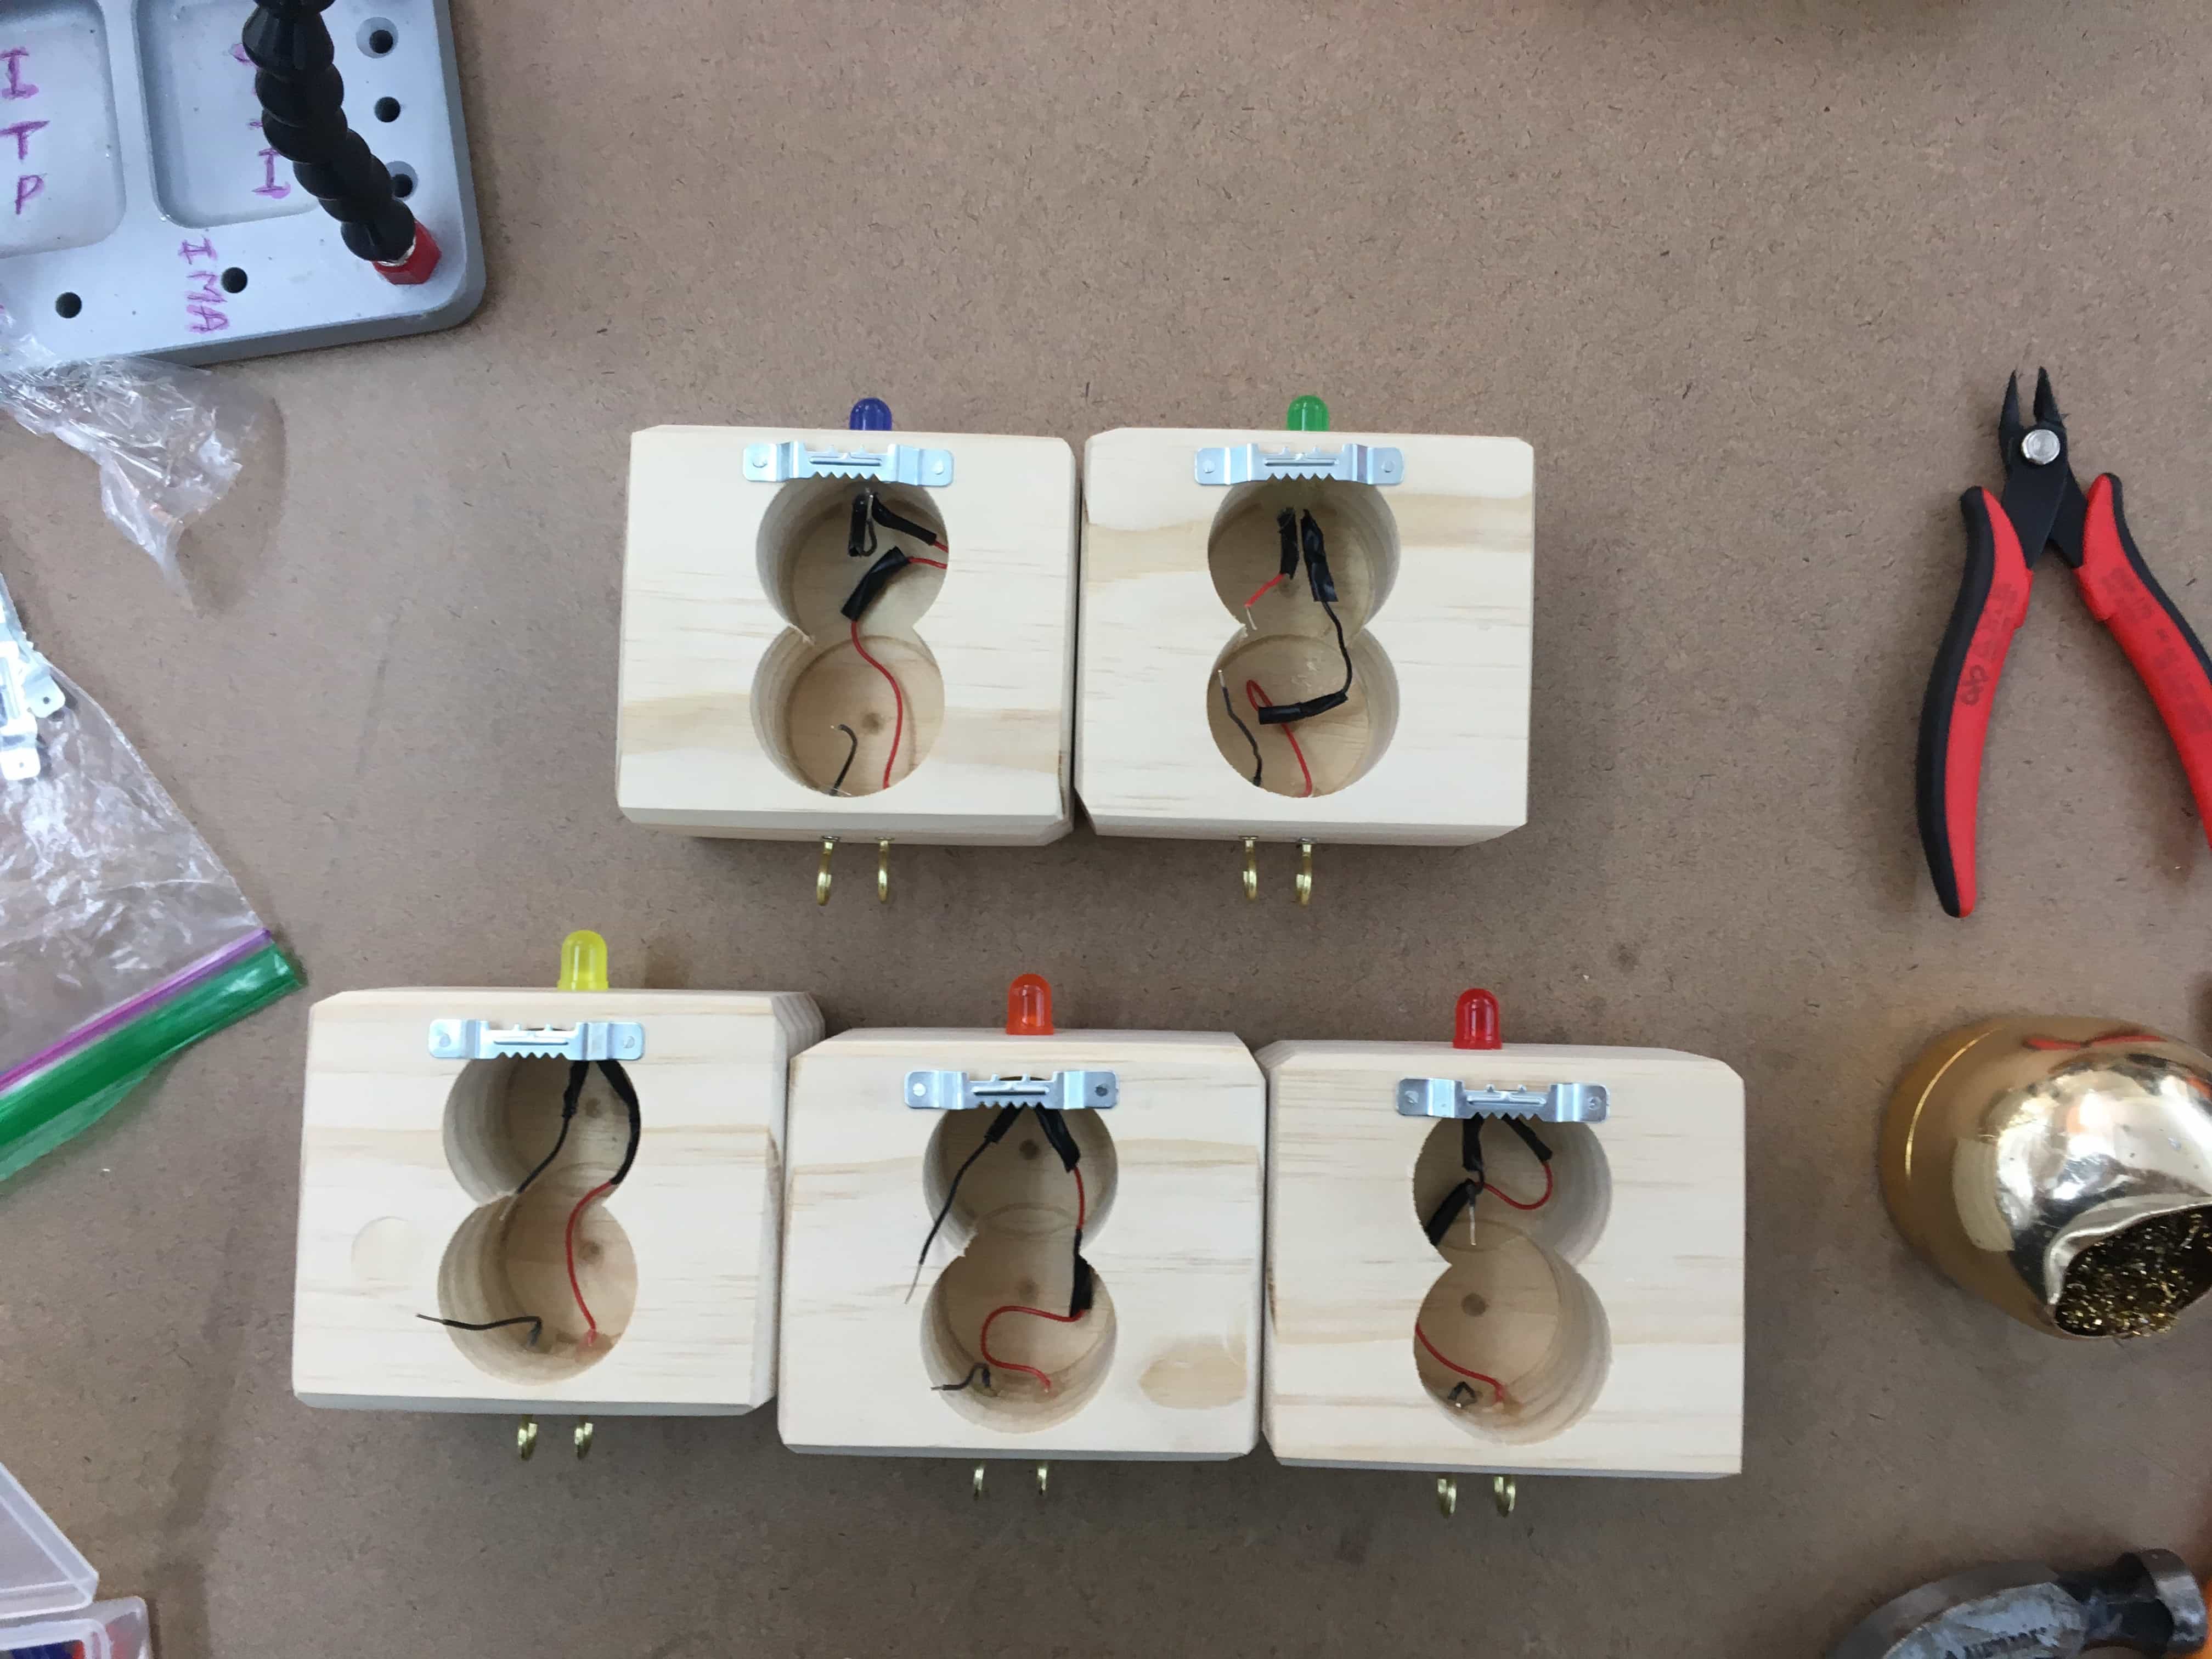
I needed to be able to add an LED to the top of the box and two metal hooks to the bottom. To allow the wires to run from the components to the space I made, I drilled into the top and bottom of the box. On top I drilled a single hole in the center. On the bottom I drilled two holes.
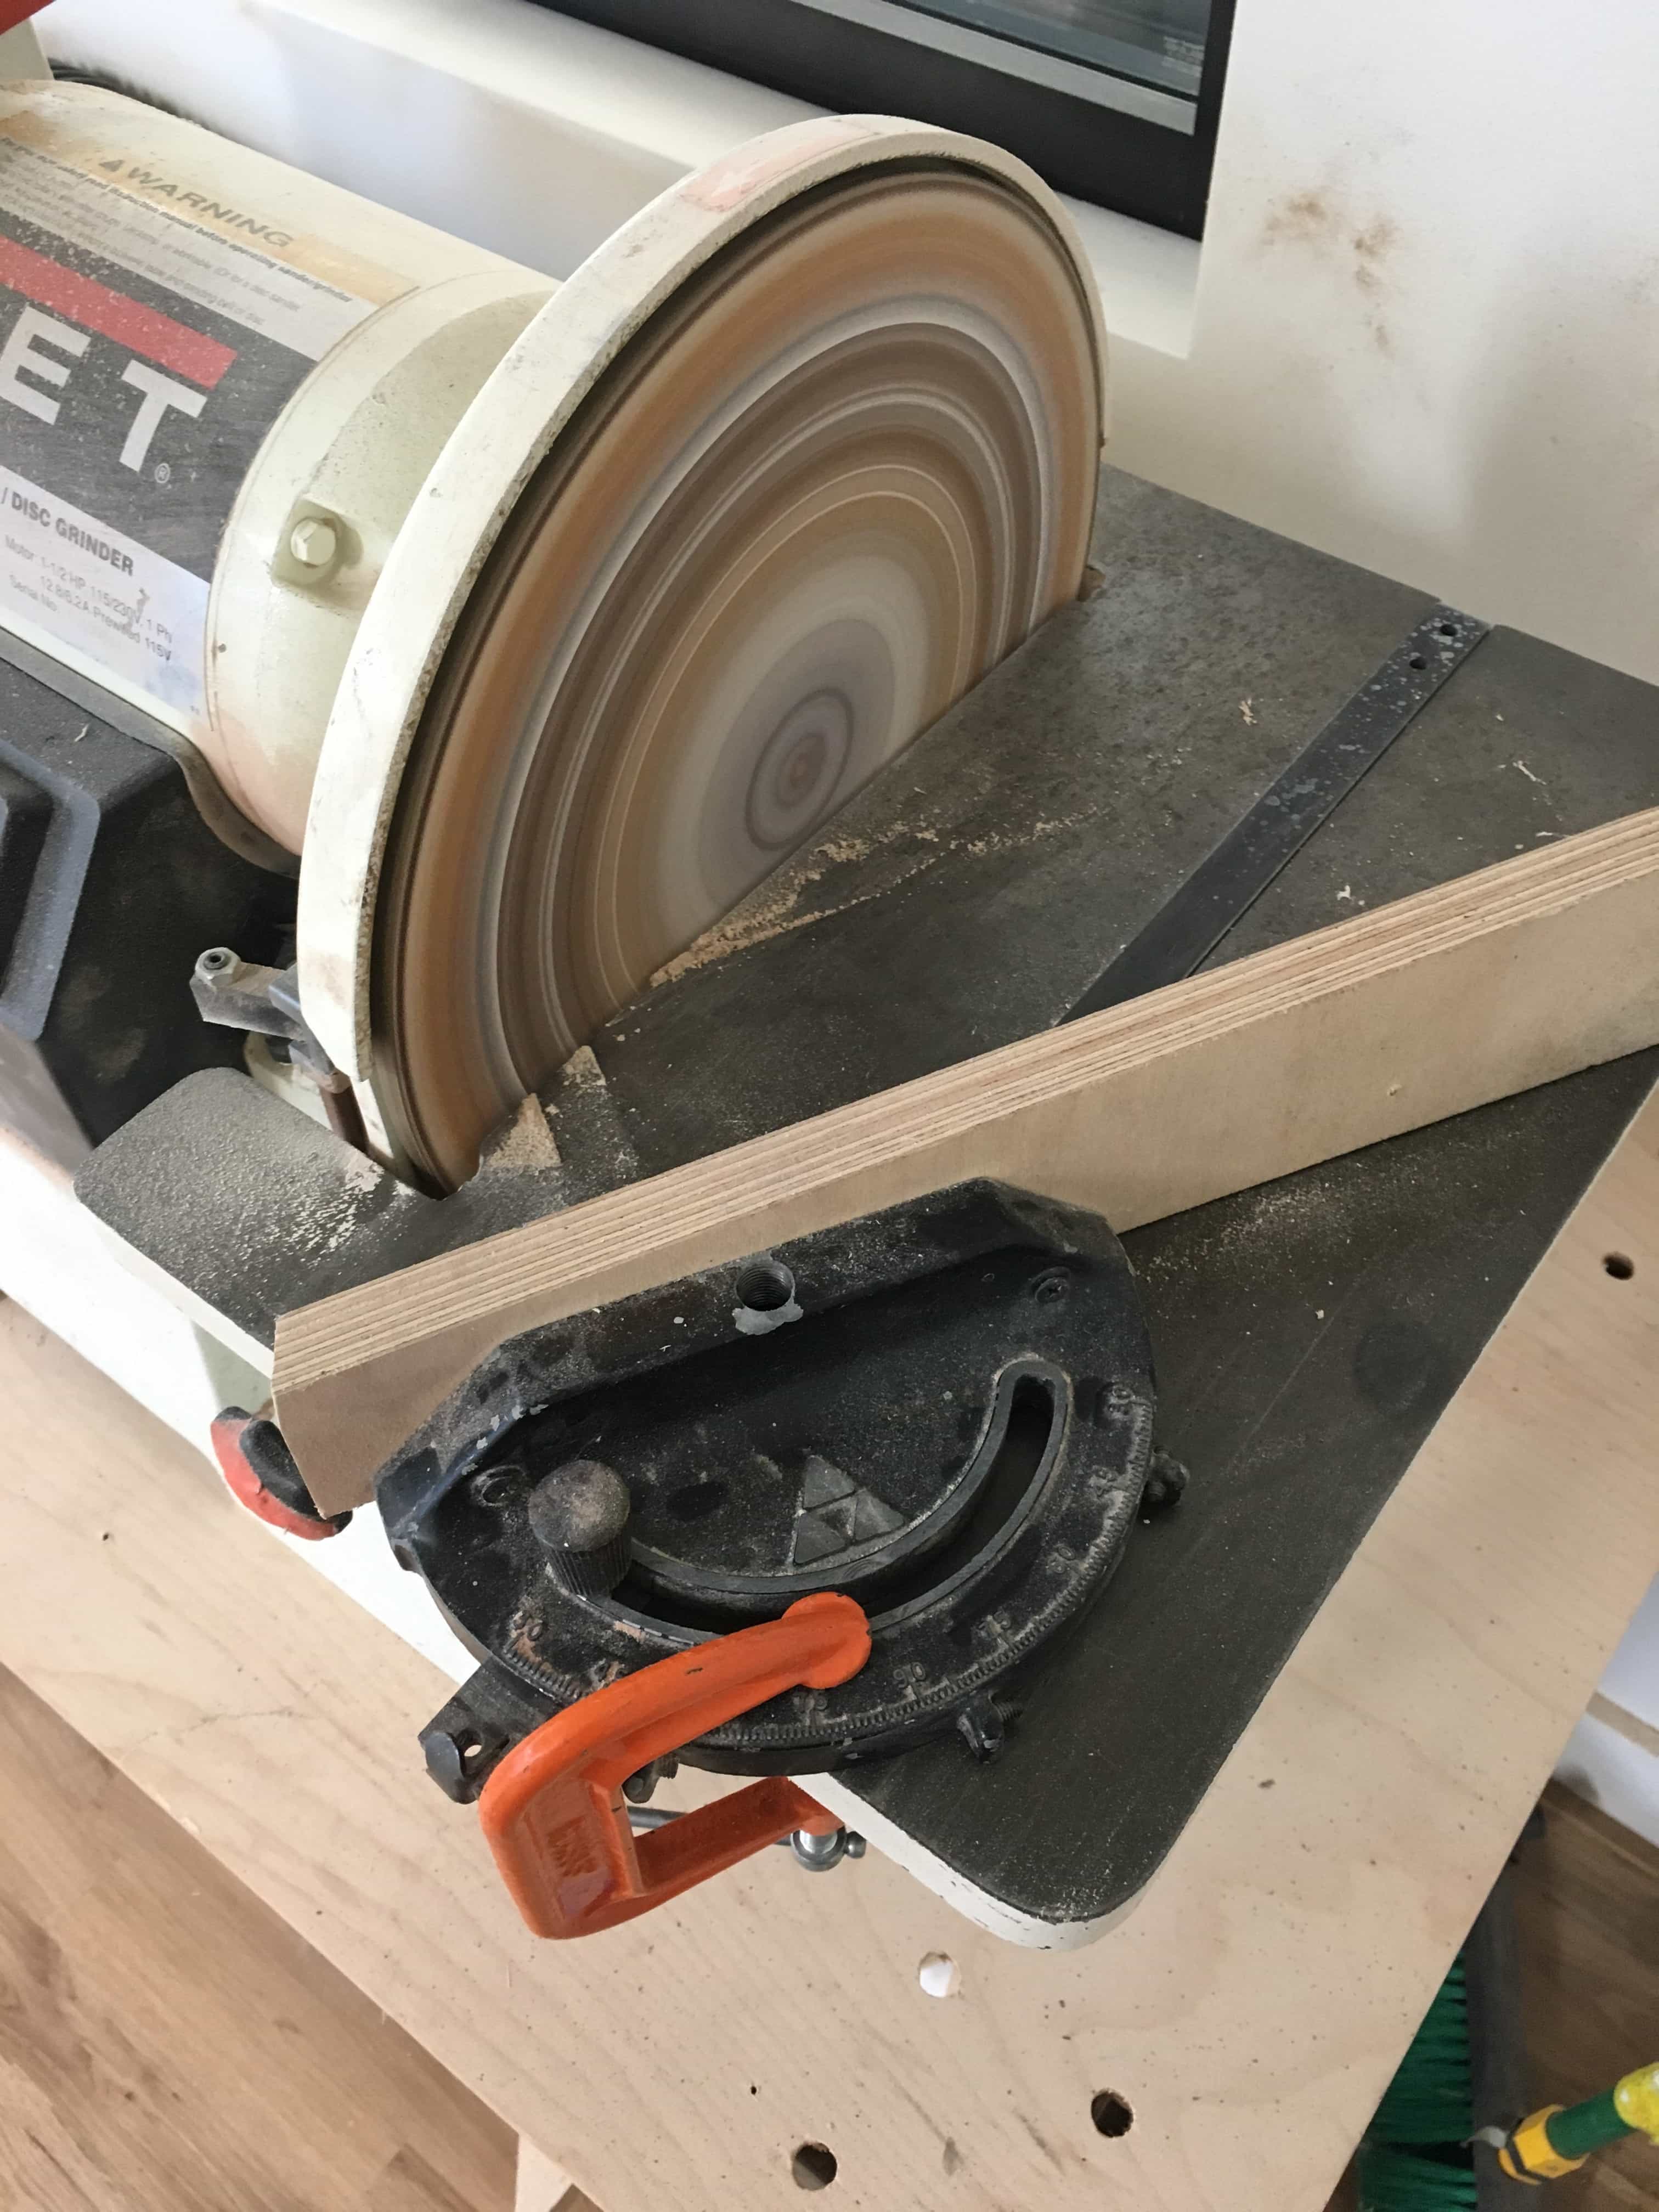
The last thing I need to do to wood was round off the corners and then all the edges. I used the sanding wheel to do this. In attempt to make the angle on the corners the same, I used a jig to position the blocks at the same angle to the sanding wheel.
It was time to add the electrical components and wire everything together.
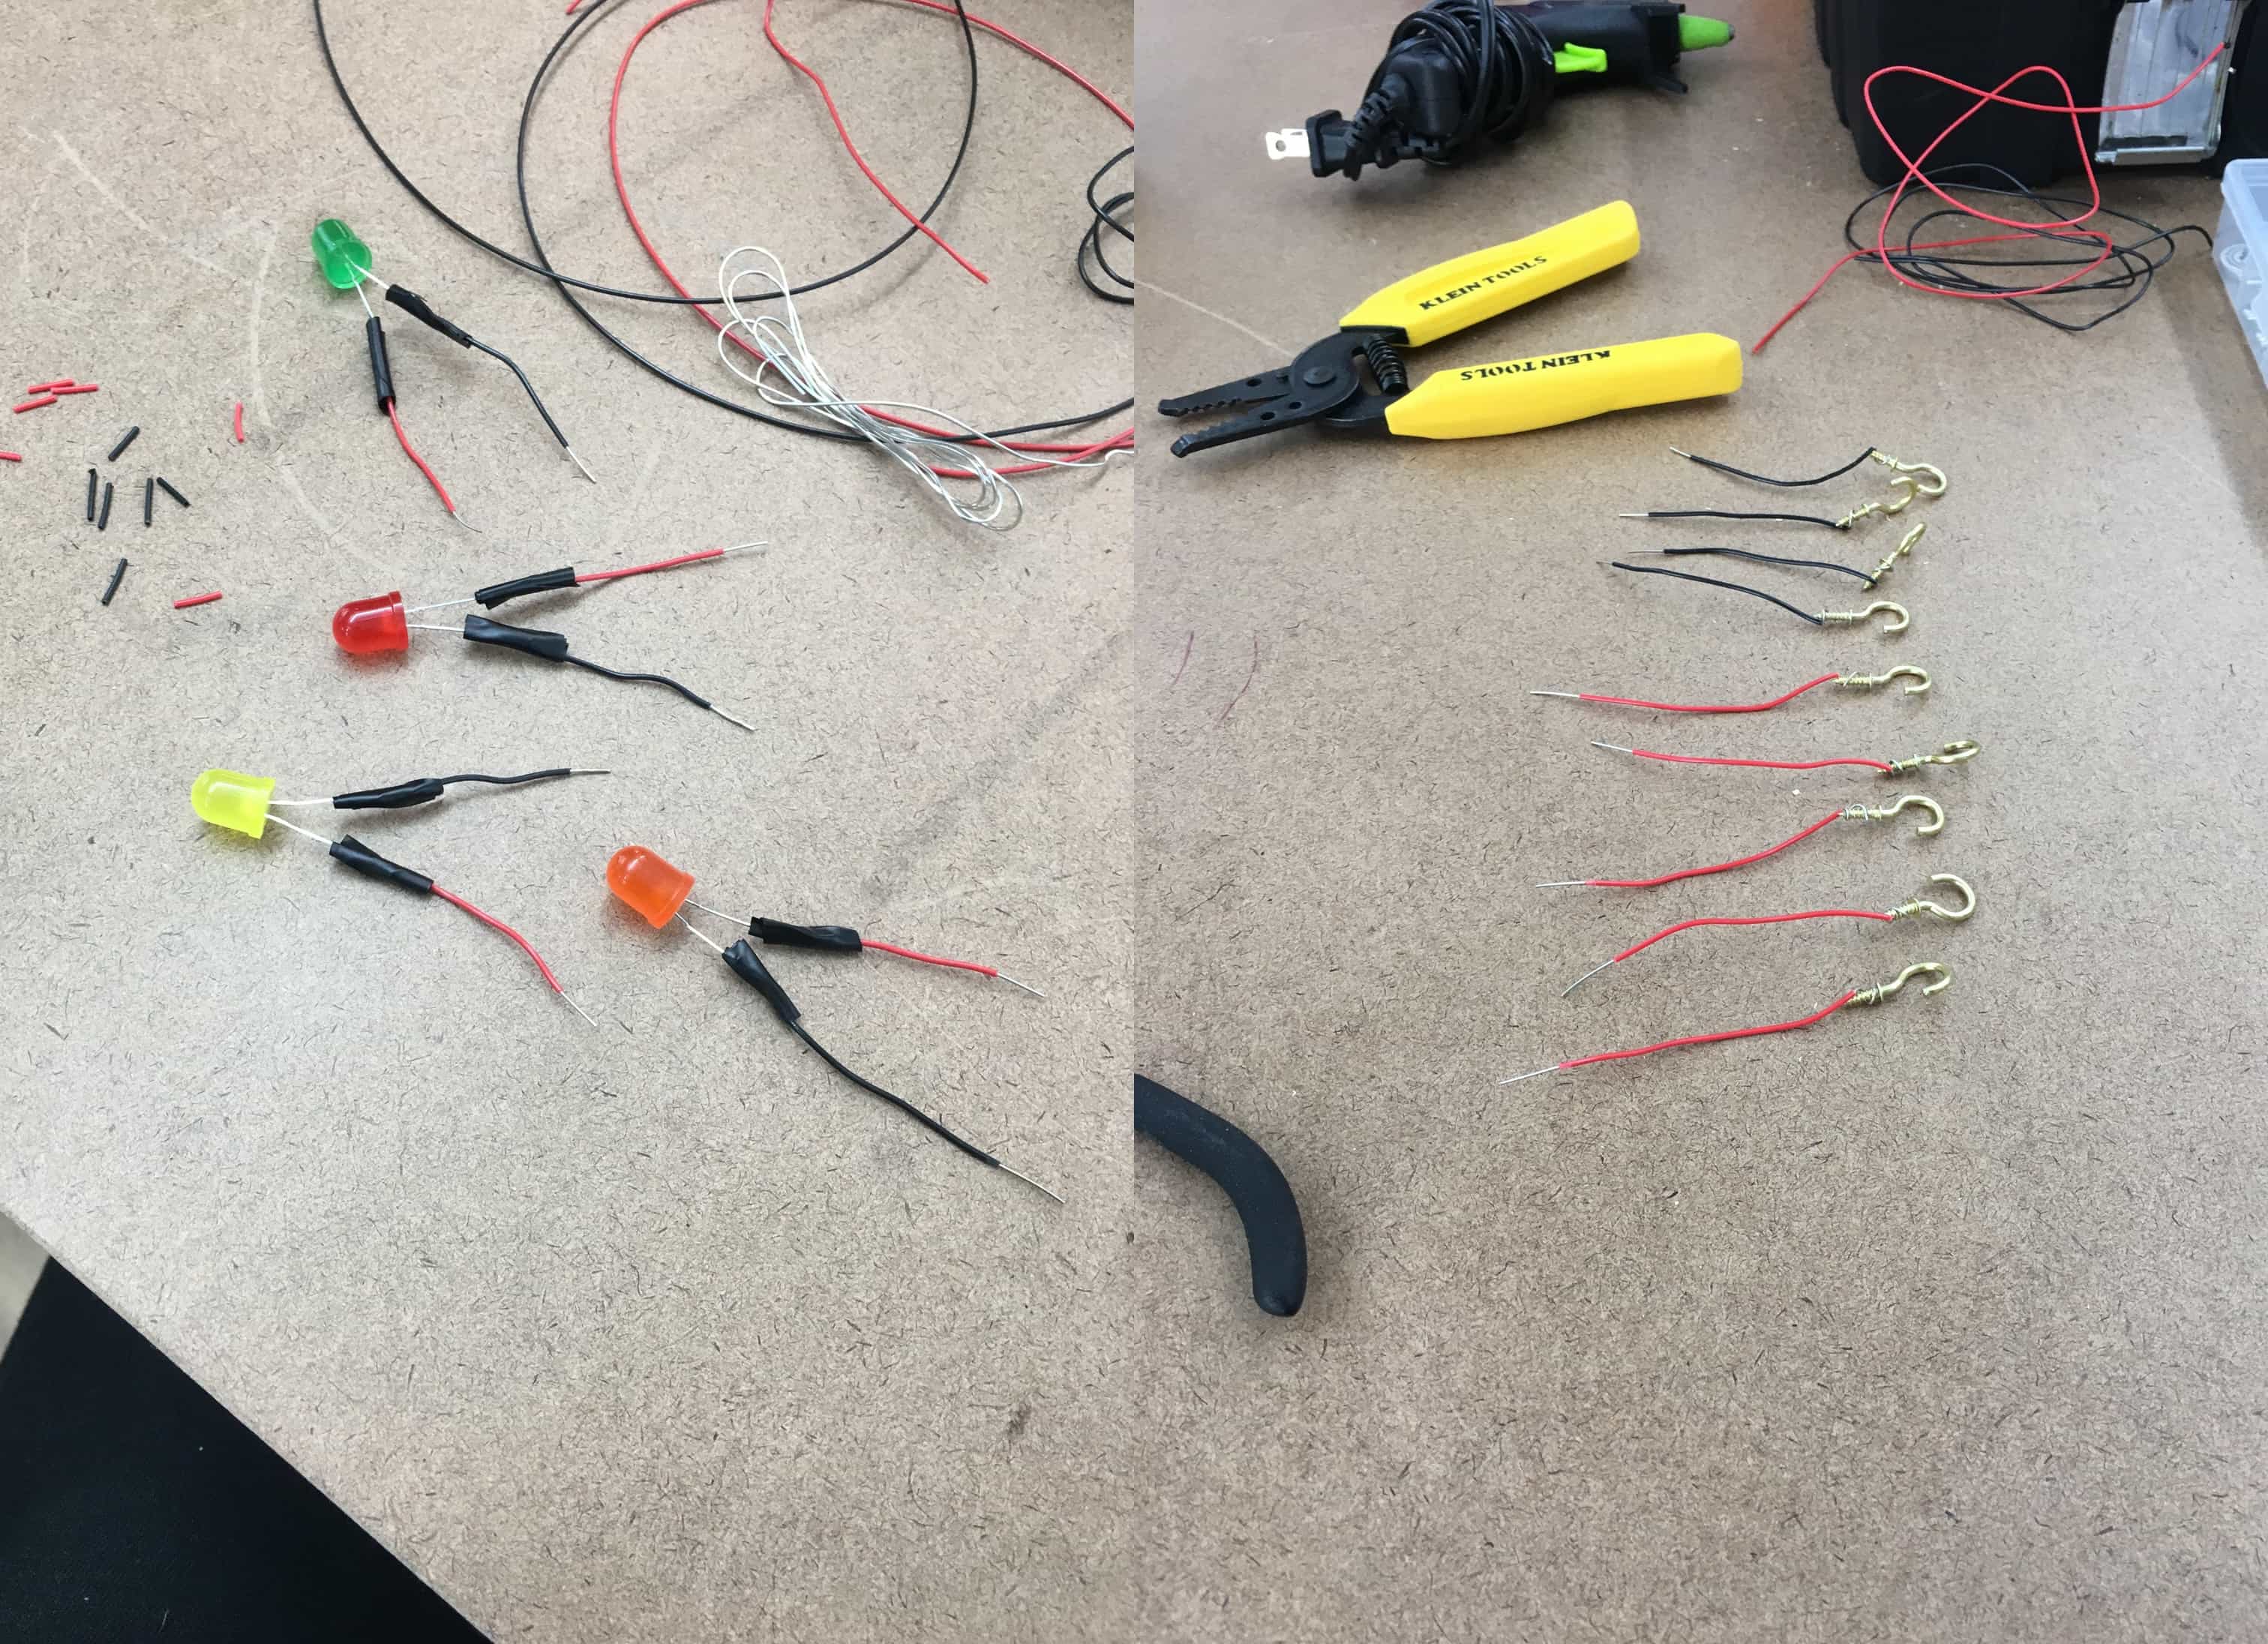
First, I made my 5 LEDs and 10 hooks. Each box required one LED and two hooks. I soldered solid core wire to the LED legs and to the screw ends of the hooks. I then wrapped the connections for the LEDs.
I mounted the LED in the top hole of each box. I used hot glue on th inside of the space to hold the LED (I used painters tape to hold the LED in place until the hot glue dried). I then screwed the hooks into the two bottom holes. I added hot glue to this as well, just in case.
To allow the boxes to be hung on walls, I added a mount to the back of each box. They came with small nails to use.
To power the boxes, I used two, 3v button batteries for a total of 6v. I soldered a button battery holder into the space, connecting the LEDs and the hooks. The hooks in this case act as switch.
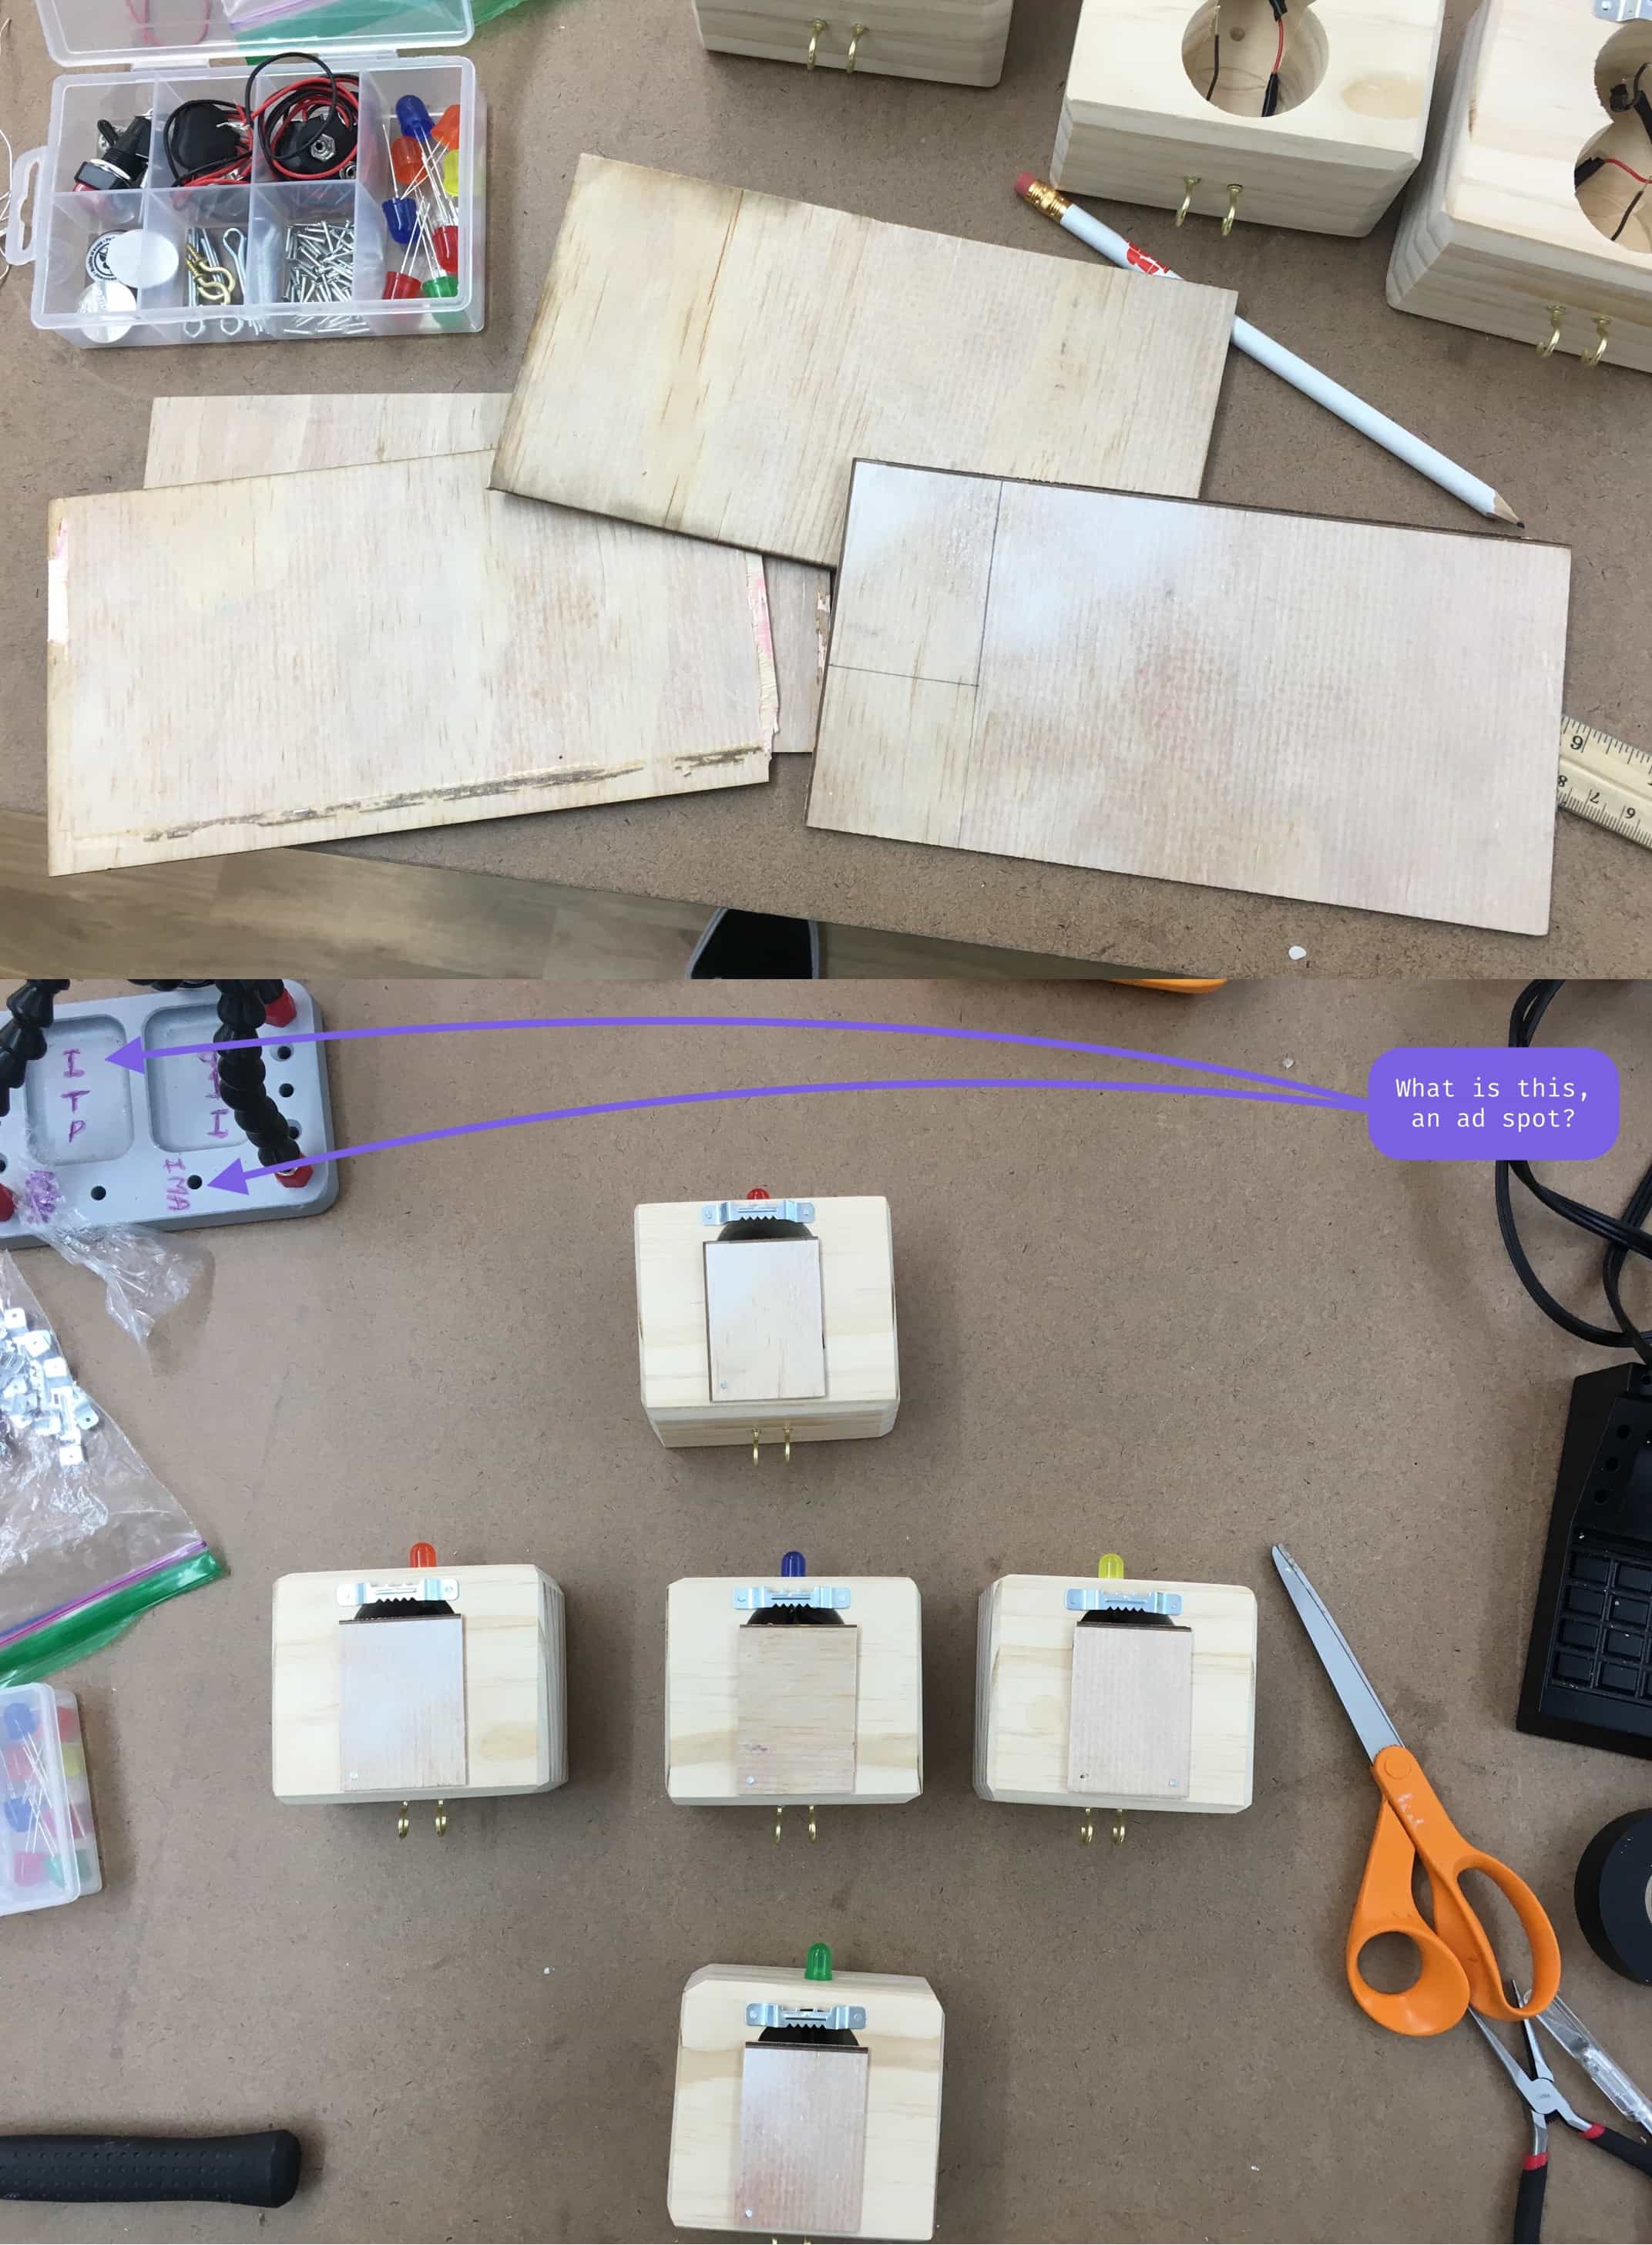
To close the space I made, I found some thing wood on the junk shelf. I cut out rectangles and mounted them to the back of the box. I used one nail in the lower-left corner so I could open the box if I needed to. The backing rotates around the nail/
To test it I put it on a wall and put a key ring across the two hooks.
What I Made⌗